What is RetroArch?
RetroArch is the easiest and best way for you to emulate your favorite retro games on basically any device – Windows, Linux, Android – it doesn’t matter, RetroArch is everywhere now, even on PlayStation Vita’s and Nintendo 3DS’.
But it’s confusing for a lot of people, might not make a lot of sense and you might have trouble understanding it, so we’re going to do a beginner’s guide to RetroArch here, only the stuff that matters and that way you can feel a lot more comfortable with it.
What can it do?
So starting off with what RetroArch can actually do, and it actually is just a frontend – meaning, it can display all of your favorite retro games, that you have to supply yourself, but it goes one step further by including the actual emulators inside of it, or what RetroArch calls cores.
Cores, going forward, is just another name for an emulator.
RetroArch core examples are mGBA, Snes9X, DuckStation, Stella, Gambatte and so on, with each core being used to emulate a different retro system.
So mGBA is for Game Boy Advance, Gambatte is for Game Boy and Game Boy Color and so on, we’ll look at that list in a bit – it’s a long one.
But it’s easy enough to understand.
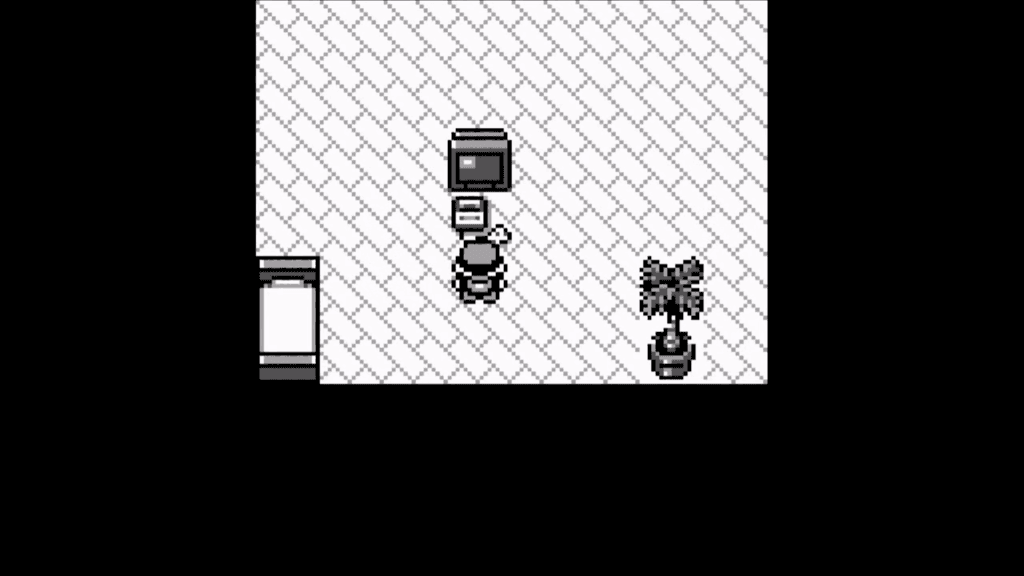
You boot up RetroArch, can see all your retro games and you play those games using these cores.
Awesome.
Installing RetroArch
Installing RetroArch depends on the operating system you’re using, but thankfully, everything is in the same place.
Head to the RetroArch.com website, then the Download tab and as you scroll down, you’ll see all the operating systems that RetroArch officially supports.
Windows
For Windows, you want to use the option that says Download (64bit).
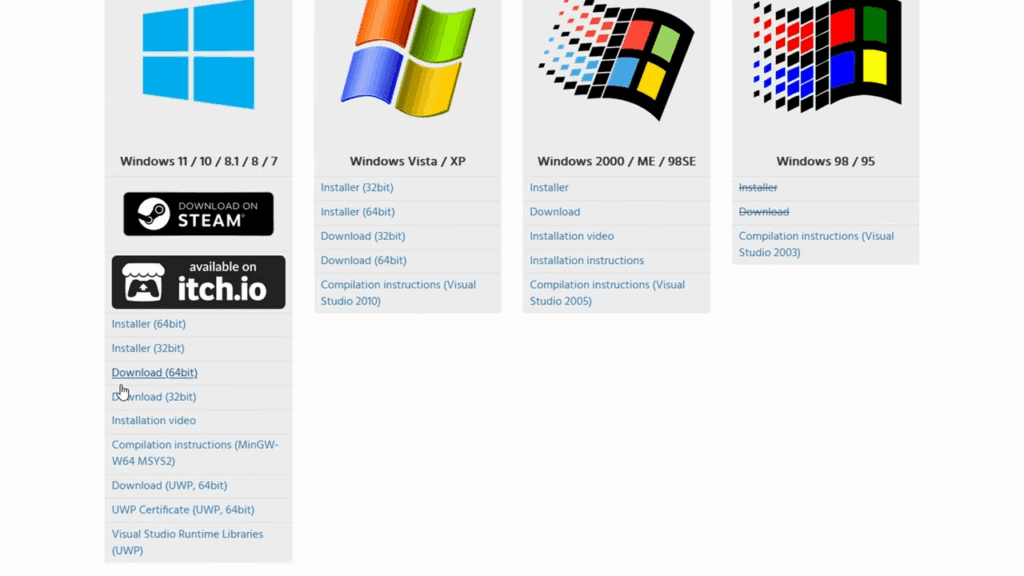
It’ll download as a zipped folder, which you can extract and move anywhere you want on your PC.
Android
Android is another big one and it gives you a few options.
Now, this is super important – the only Android option that you actually want to use is the Download (64bit) one.

The Google Play Store version is about two President’s behind and severely out of date.
Setting up RetroArch
Thankfully, RetroArch is RetroArch no matter what platform you download it on – it has the same menu items and features.

Now, that’s true for the most part, Windows gets a few more menu items, and some other operating systems as well, but the look, the feel, and the location of everything is the same.
So for today, I’m going to choose the Android version and install it.
Feel free to download whichever version for your operating system if you want to follow along.
On Android at least, you have to give it a few permissions and then we are now here at the main RetroArch menu and this is likely where you get confused.
Learning the UI
RetroArch just throws you into the deep end with no tutorial or anything, and that’s where I come in.
The UI might look slightly different on other operating systems, you might see it look like this on a lot of Retro handhelds, where it’s simply just text and old school, or on Windows handhelds, it might look like this with the sidebar on the left, or on some devices, it’ll look like a PlayStation UI.
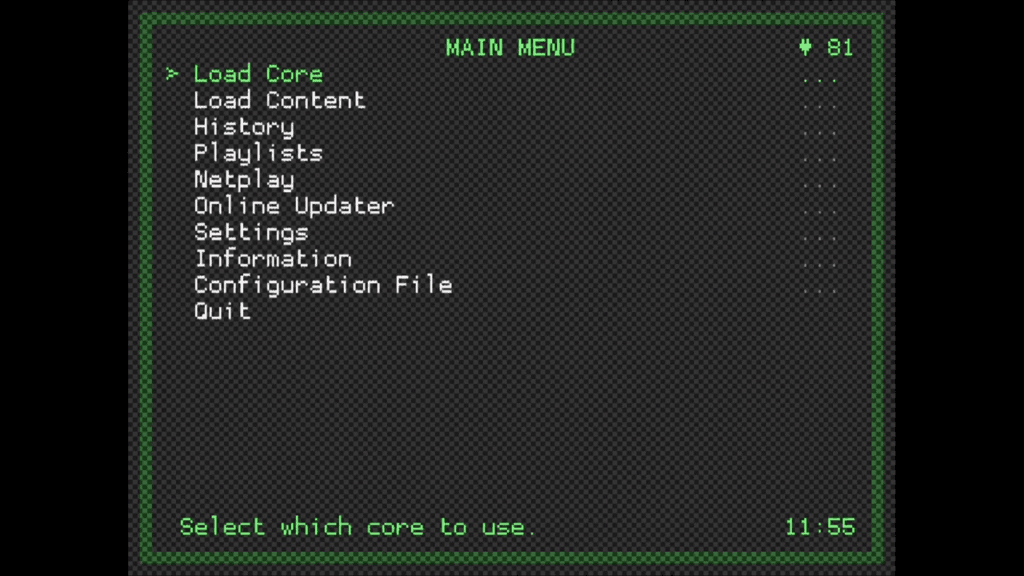
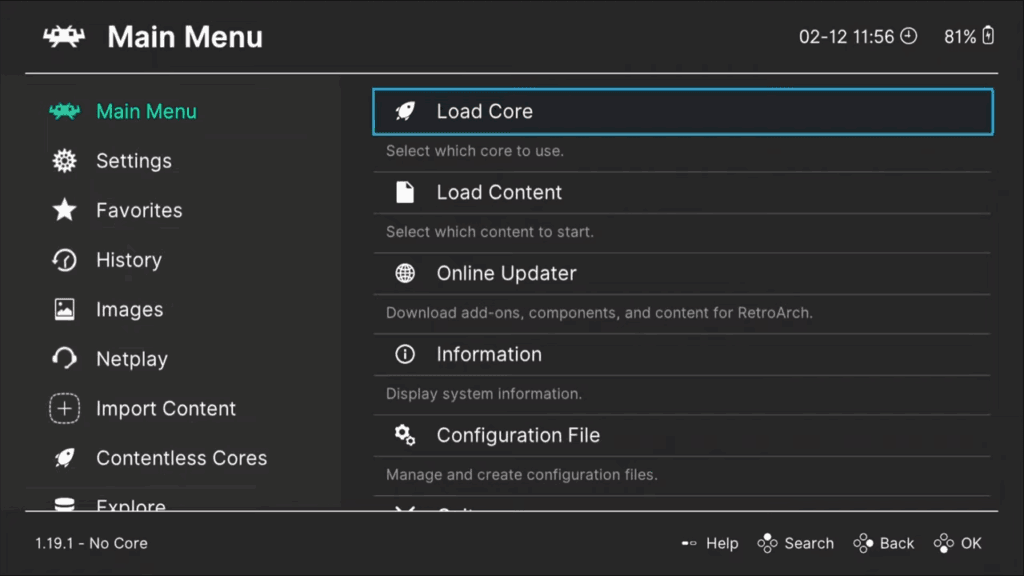
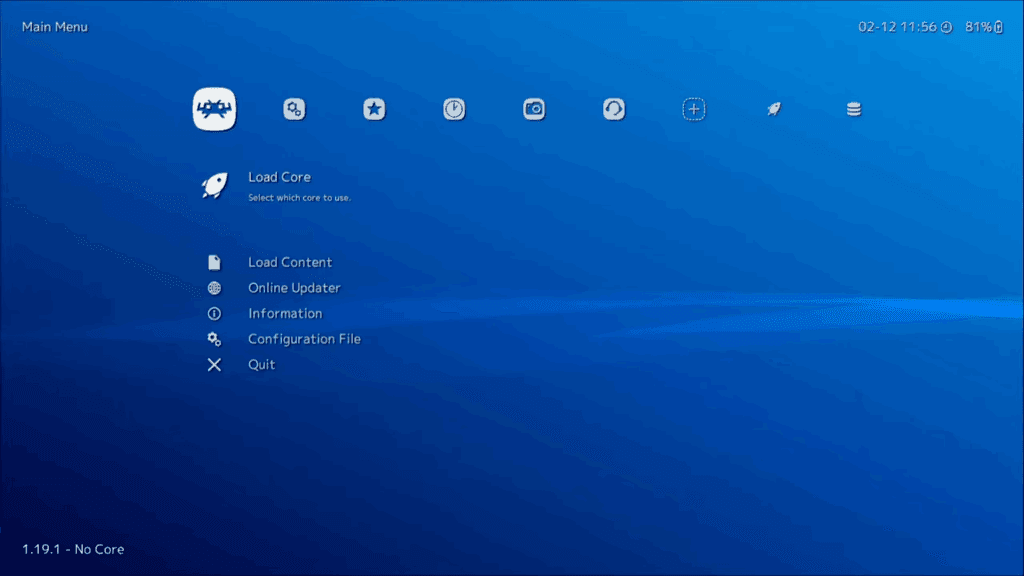
No differences between all of these, just how you navigate the menu, but everything is in the same place.
I’ll show you how to change this if you prefer one look to the other.
But anyway, back to the main screen and with this particular UI, you can see on the right we have a few icons of where we can go.

We’re in the main menu, which is the home icon right now, and if we head to the three lines, it’s a Playlist section, and to the cog, it’s Settings.
Let’s head back to the main menu or home.
Online Updater
As it is right now, RetroArch doesn’t do anything – we haven’t told it where our games are and we haven’t told it what emulator cores to use.
So the very first thing we want to do is head to Online Updater, and you’ll need an internet connection for this, and you want to select Core Downloader.
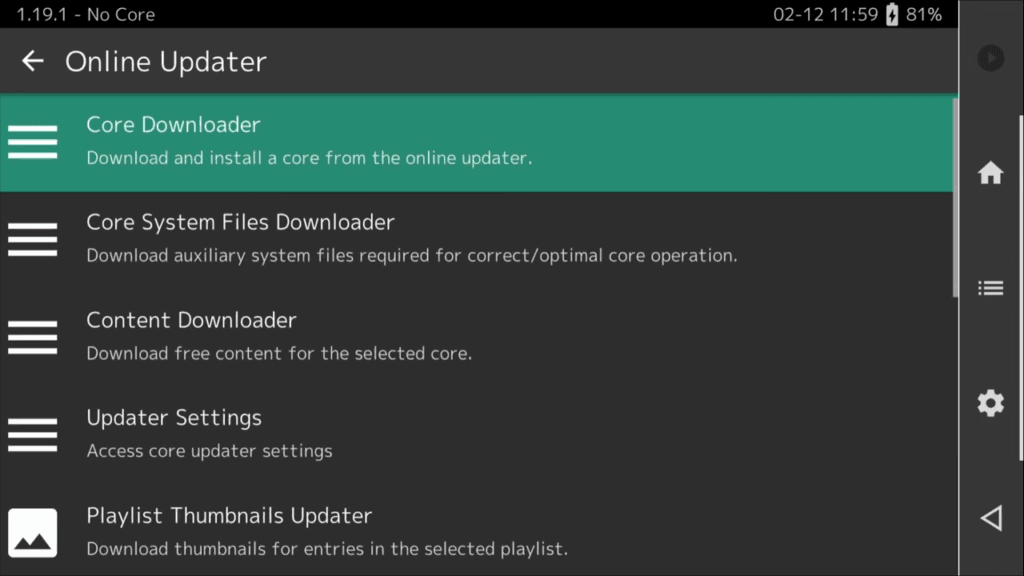
Cores & Recommended Cores
Remember again that cores are emulators, it’s just what RetroArch calls them, and as we scroll through, we see a lot of retro systems and some names in brackets – the names in brackets are the cores.
So using Game Boy and Game Boy Color again, there’s a bunch of cores available, so how do you know what to use? It’s confusing right.
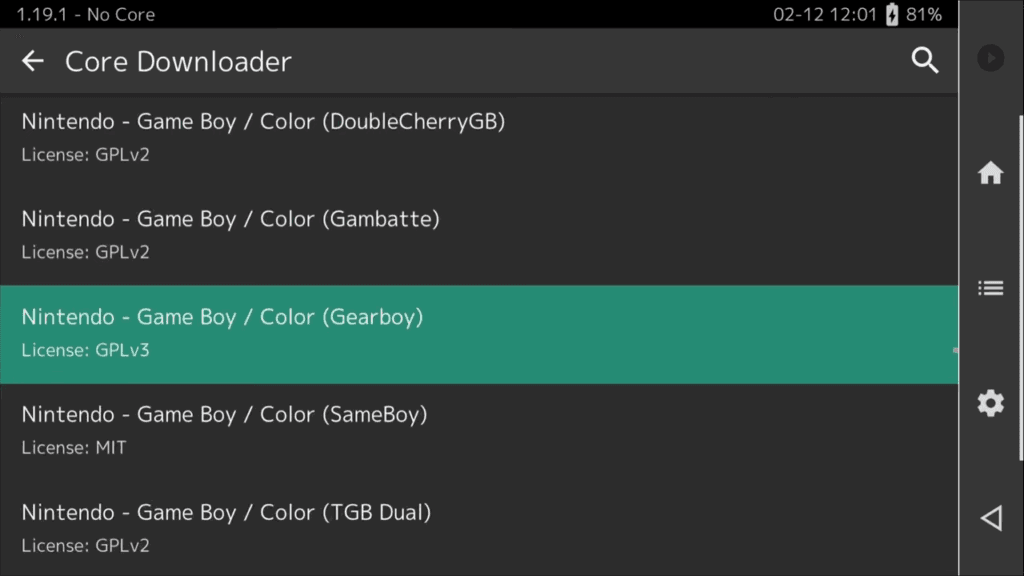
And well, there’s no good answer to that without you spending hours researching, but I’ll leave my list of cores for the popular retro systems below for what I personally use, and that’s better than a Nintendo Seal of Quality.
Here’s my recommended cores:
- Atari 2600: Stella
- Atari 5200: Atari800
- Atari 7800: ProSystem
- Atari Lynx: Mednafen (Beetle)
- Arcade: FinalBurn Neo
- Nintendo Entertainment System: FCEUmm
- Nintendo Game Boy Advance: mGBA
- Nintendo Game Boy/Game Boy Color: Gambatte
- Nintendo 64: Mupen64Plus-Next GLES3
- Nintendo DS: MelonDS DS
- Sega 32X: PicoDrive
- Sega Dreamcast: Flycast
- Sega Genesis/Master System/Game Gear/CD: Genesis Plus GX
- Sega Saturn: Beetle Saturn
- Super Nintendo Entertainment System: Snes9x
- Sony PlayStation 1: SwanStation
There are way more systems than that, so feel free to add any other cores for any other systems that you play.
For Android, there’s a lot of scenarios where standalone emulators are much better than RetroArch cores, so if you’re curious what my full Android emulator recommendations are, you can find that list here.
Now, all you need to do is find those emulator cores in this list, and select them.
So for example, Gambatte is the preferred emulator core for Game Boy and Game Boy Color, so select it to install it.
It’ll say downloading, then extracting then done.
Scroll this list, find the cores you want and do the same thing – select to install.
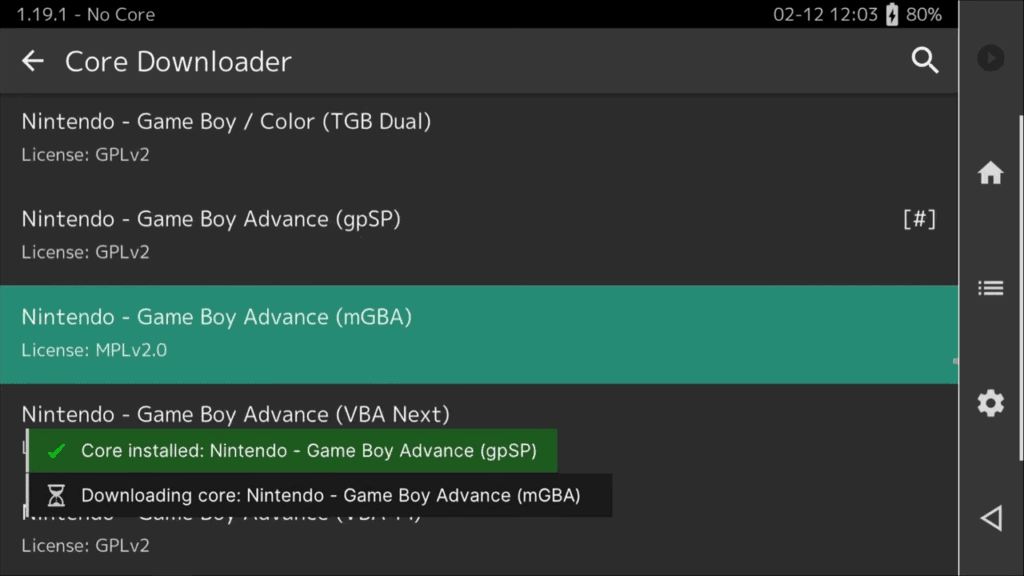
Reminder again that when you come across cores for PlayStation Portable or GameCube or something I didn’t list above, it’s likely because the standalone emulator is just much better – which you can see in that link above once again.
Update Cheats
Once you install some cores, let’s back out one step.
RetroArch is full of a lot of options that we can really safely ignore, as today’s guide is for a beginner setup.
But let’s scroll down here and there’s an option here for Update Cheats.
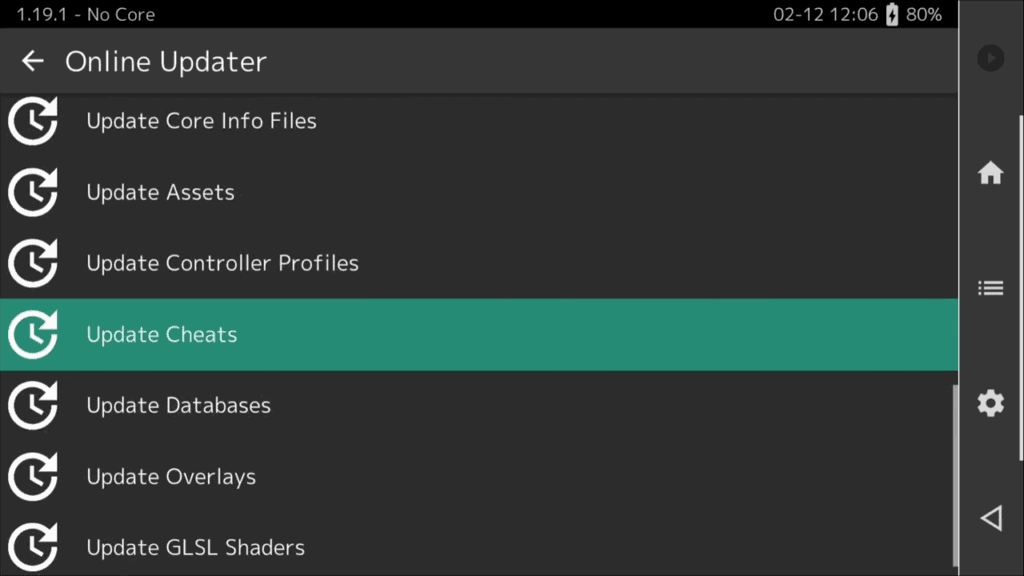
What this will do is download a whole bunch of cheats, a big database of them, for you to use.
It’s up to you, but for the purpose of today’s guide, I’m going to select this so I can show you how to use them later.
Cheats take a long time to download and extract, so let’s continue as it does its thing.
Home Menu
Head back and let me explain this home menu now.
The first thing you need to be familiar with is Configuration File.

Whenever you make changes in RetroArch, you need to save them.
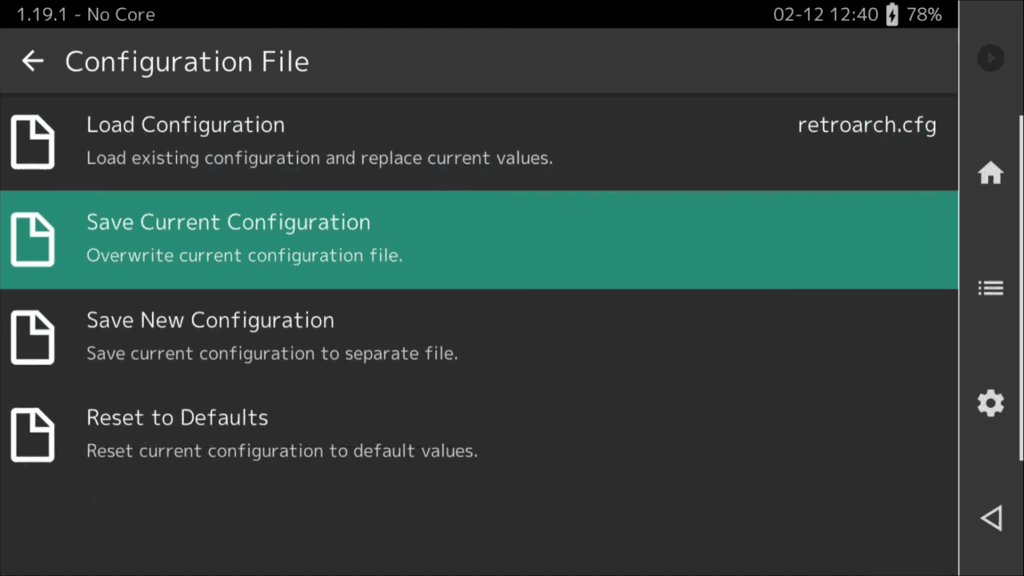
So head into here, and you want to be careful in this menu, but always choose Save Current Configuration.
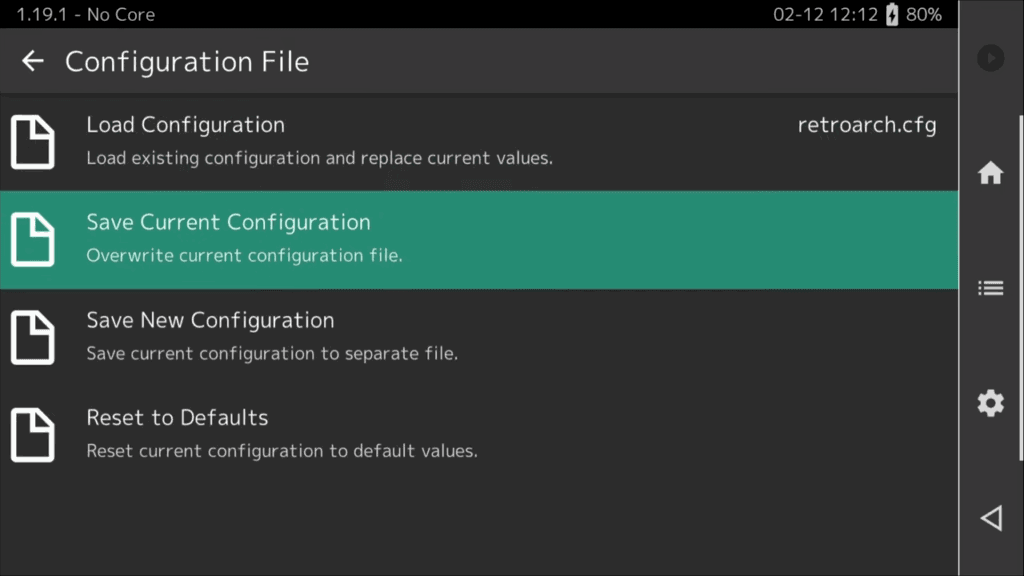
For a beginner, none of the rest matter, ignore them – just condition yourself to always choose Save Current Configuration.
Starting Games & History
Head back and Load Content is an easy way to start your games, which once again, have to be supplied by you – RetroArch does not include games.
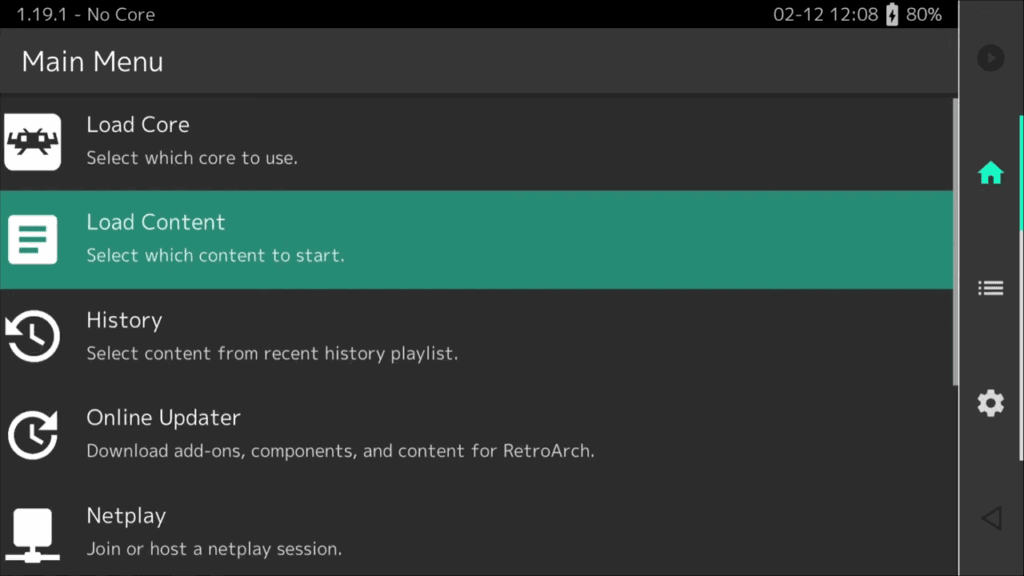
If you need help finding games, see the below video.
If we select Load Content, it gives us a few starting points of where we can start our search so it all depends on where and what folder you put your games in.
On Android, /storage/emulated/0 is a good starting point for the internal storage, so let’s head there.
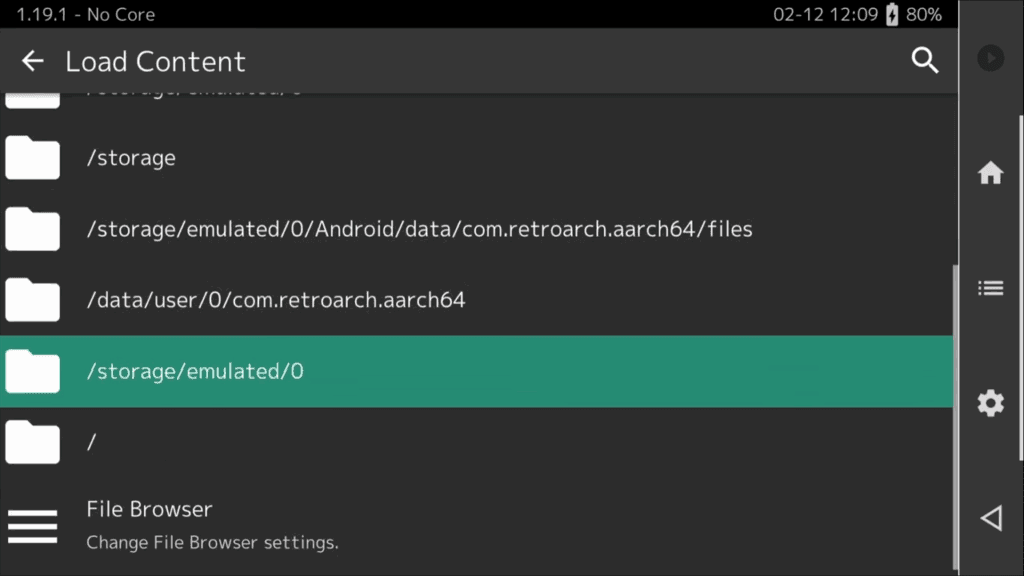
If you’re using an SD card for your ROMs, it’ll likely be /storage/DIGITS/ as your starting point.
If I scroll down, I can see my ROMs folder that I have, and inside of that, I have my system folders.
If I head into gb for Game Boy, I’m going to select a game, so Adventure Island, then Load Archive, and now it’s asking me – hey, what emulator core do you want to use for this game? Because it’s not smart enough to know.
And this is a Game Boy game, so we know it’s Gambatte.
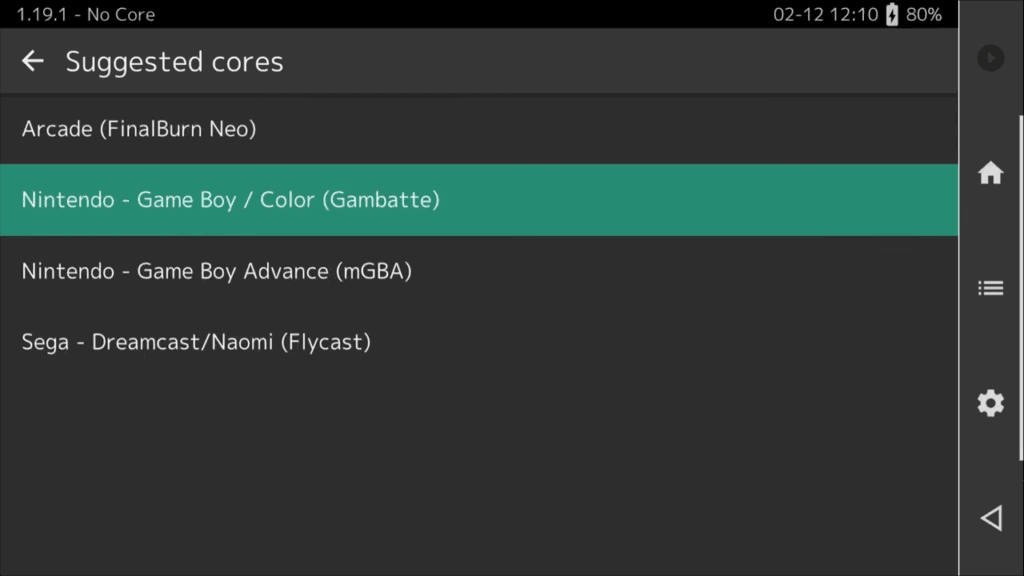
Boom, the game loads, and on Android, there’s ugly on-screen touch controls, and we can’t really play anything since we didn’t setup our controller or controls, so I’m going to exit using the RetroArch icon, then Close Content.
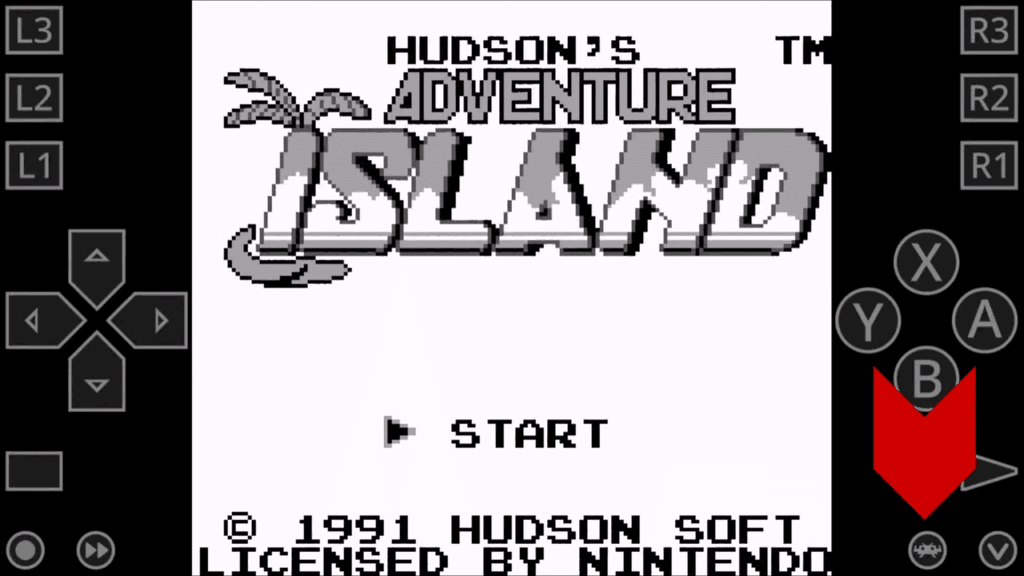
You may not have that option on another operating system, so you can close RetroArch and come back in.
History is an easy way to load games you recently played.
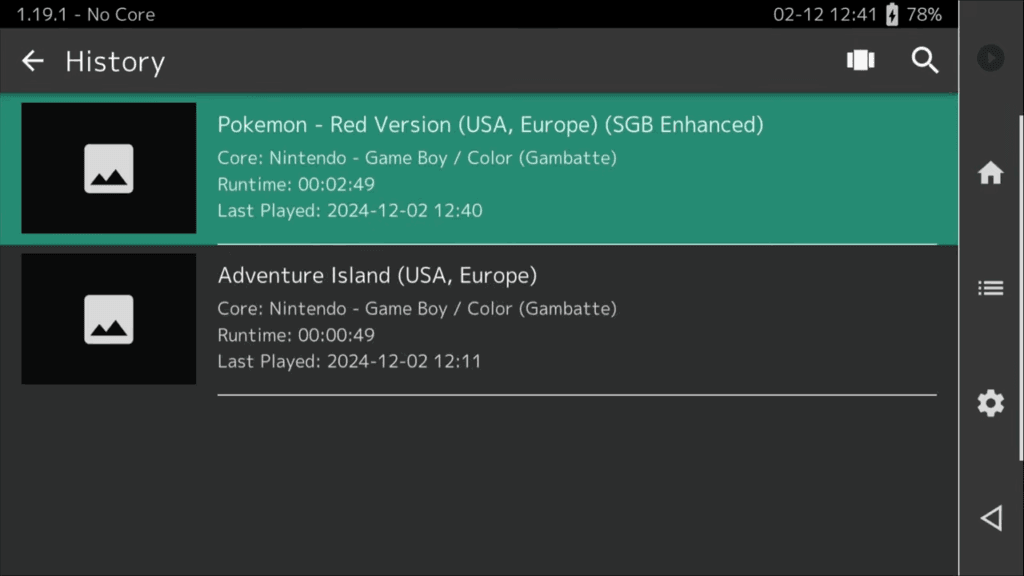
We’re not going to dive deep into organization for RetroArch today, and mostly rely on Load Content and History to play your games.
Organizing games in RetroArch could be a whole other video by itself.
RetroArch Settings
Let’s head over to Settings.
User Interface
User Interface is important, let’s go there.
If you scroll down, you’ll see an option called Menu, and mine is set to glui.

Remember all the different user interfaces I showed before? This is where you can change it if you prefer a different one.
I actually like glui, so I’m keeping it like this, but it’s up to you.
If you’re someone who gets confused when following a guide and things don’t match up, choose glui to follow along with me.
Display Framerate
On-Screen Notifications is slightly important, let’s head inside and then Notification Visibility, and this is a way to turn on displaying the framerate of a game as a default option.
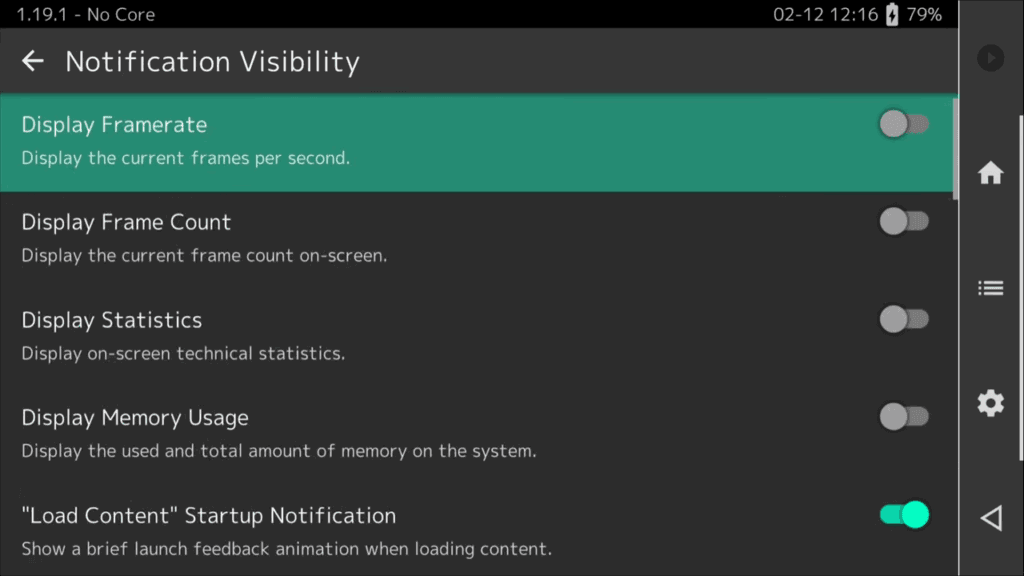
So if you always want to see this, you can turn it on here.
I’ll actually show you how to set this as a hotkey instead, for times you want to bring it up, so I’d suggest keeping this off.
Remove on-screen touch controls
Let’s go into On-Screen Overlay and if you plan to use a controller or have controls built-in, you’ll want to disable this if it isn’t already disabled.

This removes all those pesky on-screen controls we saw earlier because playing retro games using touch screen controls is one of the scariest things I can think of.
Input
Video and Audio are safe to skip as a beginner, but let’s head into Input.
RetroPad Binds is where you can setup your controller or controls, so let’s do that.
You’re going to see a bunch of port options here, 1 to 8 and that basically means you can setup 8 different devices if you’d like, and want to play multiplayer.
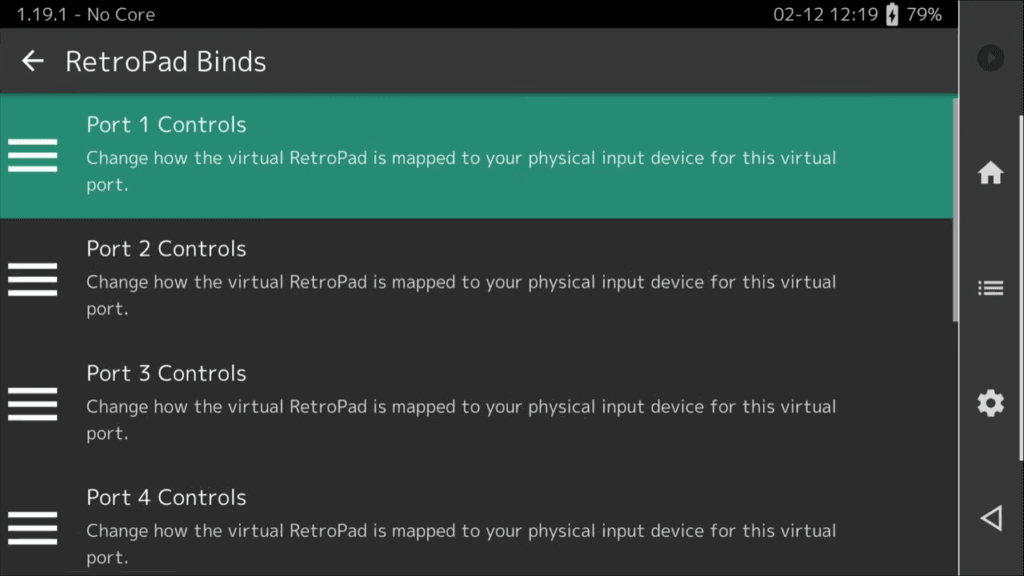
But for today, we’re only setting up one so head to Port 1 Controls.
Button Mapping
Alright, so the first option is asking if you want to use your analog stick, in addition to the dpad, in games that only had a dpad option.
Yeah, you know, sometimes I want to use that stick to move, so if you select it, you can choose Left Analog.
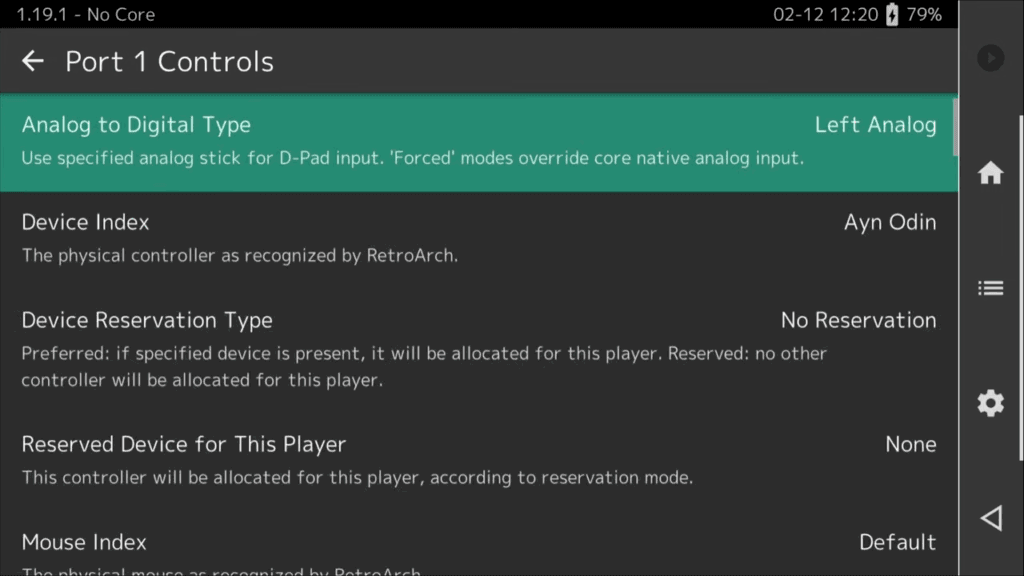
Scroll down and D-Pad Up is the first option for what we have to map.
And what we’re doing here is telling RetroArch, hey when a game needs this button, it is actually this button on my controller.
So obviously, dpad up in a game, would be me pressing dpad up on my controller.
So select it, press dpad up, and it maps to it.
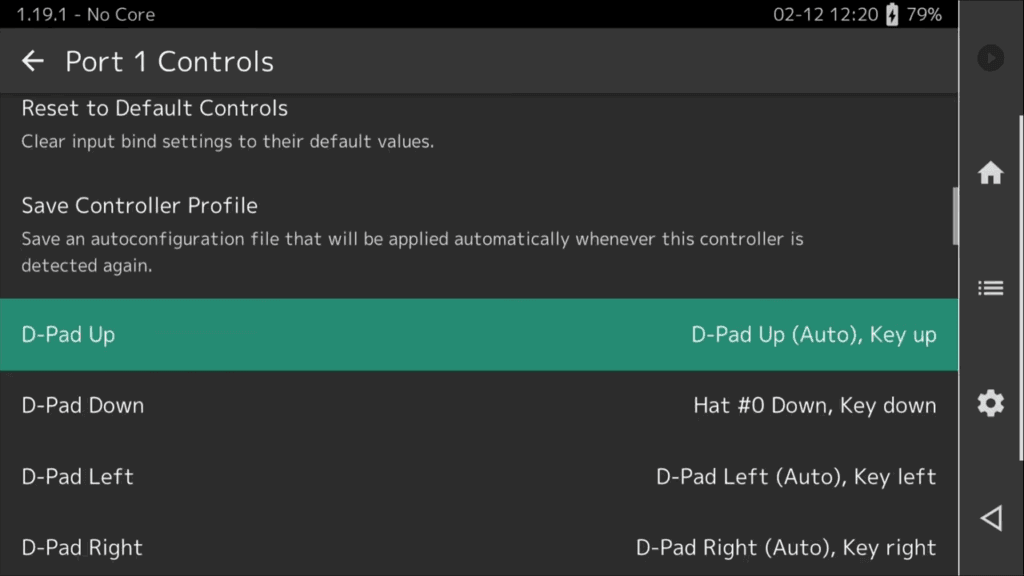
Same thing for the other dpad directions.
Then we get to buttons, and what’s the b button on your controller.
So once again, select it and push what you want B to be.
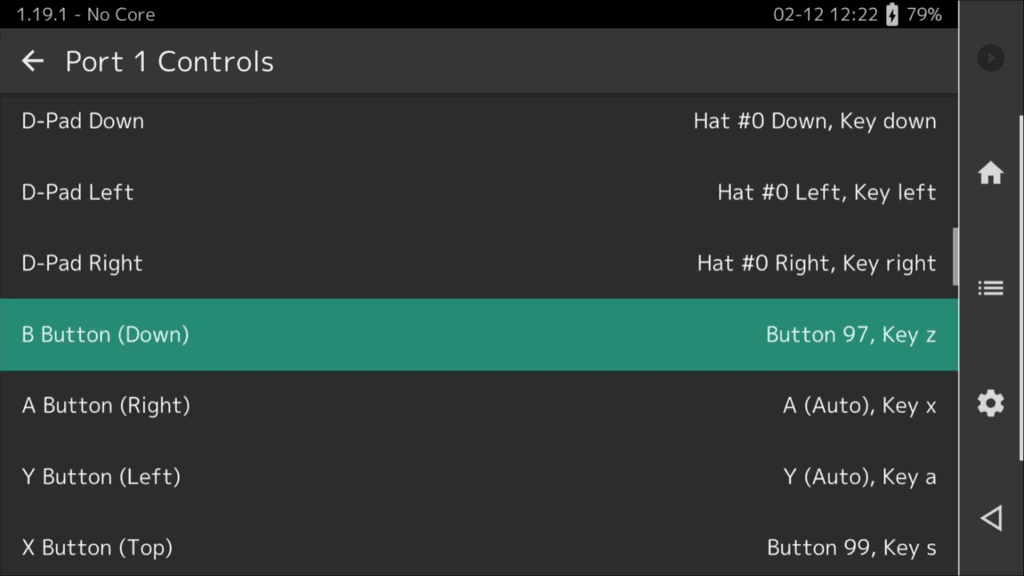
Do the same for the others.
And make your way through all of these.
If you happen to make a mistake, just remap it.
Once you get to Gun Trigger, you can stop at Right Analog Right.

Awesome, we’ve told RetroArch what our controller will be using for everything.
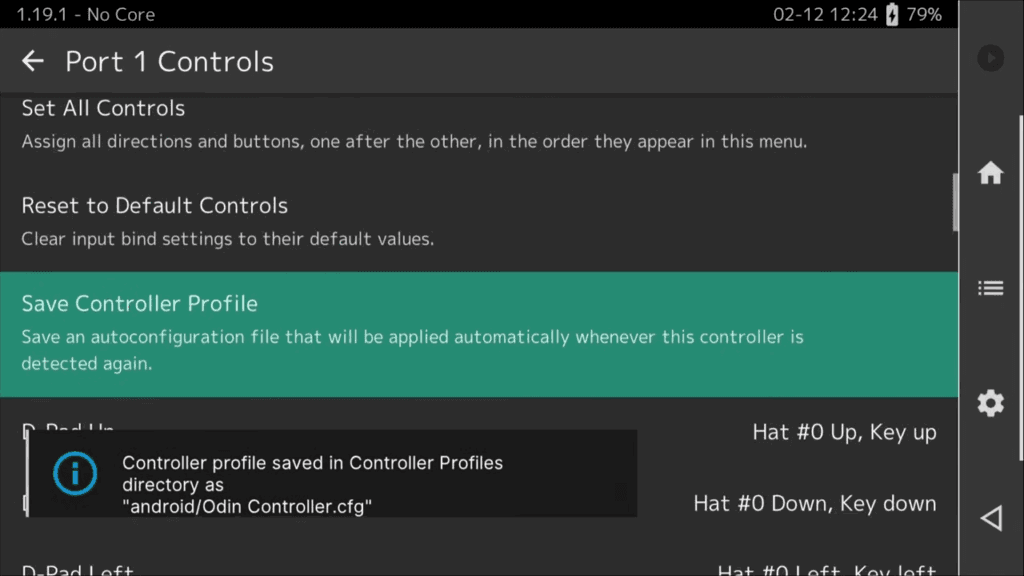
Go up and select Save Controller Profile.
Hotkeys
Let’s go ahead and back out a few spots to the Input screen.
Hotkeys is where we want to head next.
So hotkeys allow you to quickly do something in the game at the push of two buttons.
For example, maybe you want to fast forward, or maybe you want to save state, maybe you want to just exit the game or make changes, that’s all here.
We need to set a Hotkey Enable button, basically, one of the buttons in the combination.
I typically use L3 as this option, so select it, and push L3 on your controller.
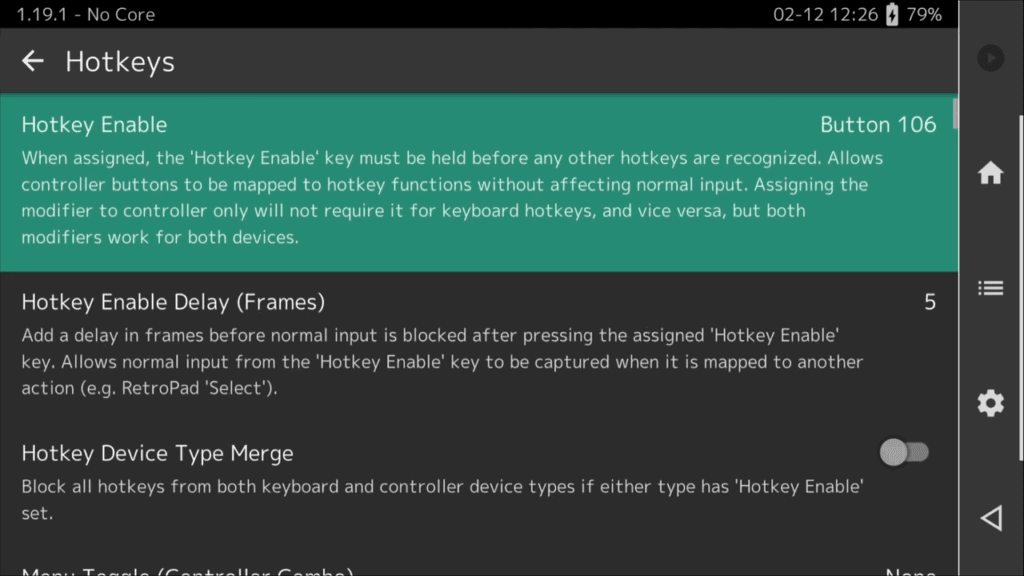
Go ahead and scroll to Menu Toggle, and this will let us bring up RetroArch’s menu in-game, so we want this.
I usually set this to X, or the top button on the controller.

There’s two Quit’s, skip the first.
Basically, to exit RetroArch properly, ensuring all our save data gets saved and nothing breaks, we want to set it here.
I usually set this to Start.

So reminder again for what we’ve done – L3+X will open the RetroArch menu in-game, and L3+Start will exit the game and close RetroArch.
Awesome.
This is very important, but you always want to exit RetroArch using this hotkey, or using close content in the in-game menu.
Closing RetroArch any other way can corrupt your save data and cause massive problems, especially for those that use the Home button on a handheld to exit games, don’t do that, stop doing that.
Fast-forward Toggle is another that I like, and I set this to R2.

Load State and Save State are two others that are useful, and we’ll talk about later, but I set this to L1 for Load State and R1 for Save State.

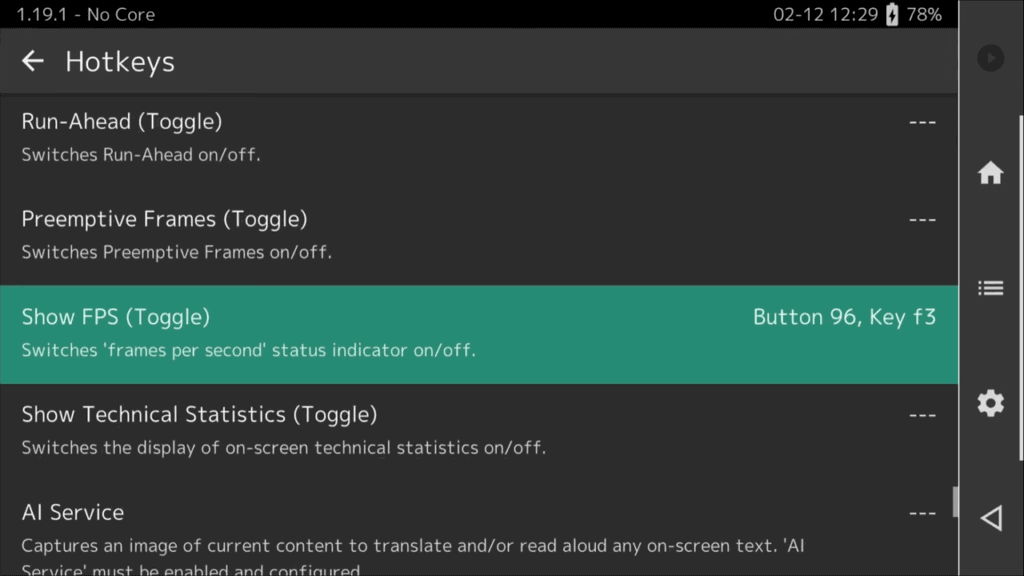
Lastly, I promised you a way to show your Framerate by hotkey, here it is. I set Show FPS to A or the right button on my controller.
Turn off Confirm Quit
Back out, and there’s one other annoying setting.
Scroll down to Confirm Quit.
Basically, anytime you try to exit using the hotkey, it will ask you to do it again to make sure you want to exit the game.
This annoys me so I turn it off.

Always Save
Let’s back out.
We’ve done a lot, so let’s save our progress.
Head back to Main Menu > Configuration File and Save Current Configuration.

Make this a habit.
RetroAchievements
Let’s head back to Settings.
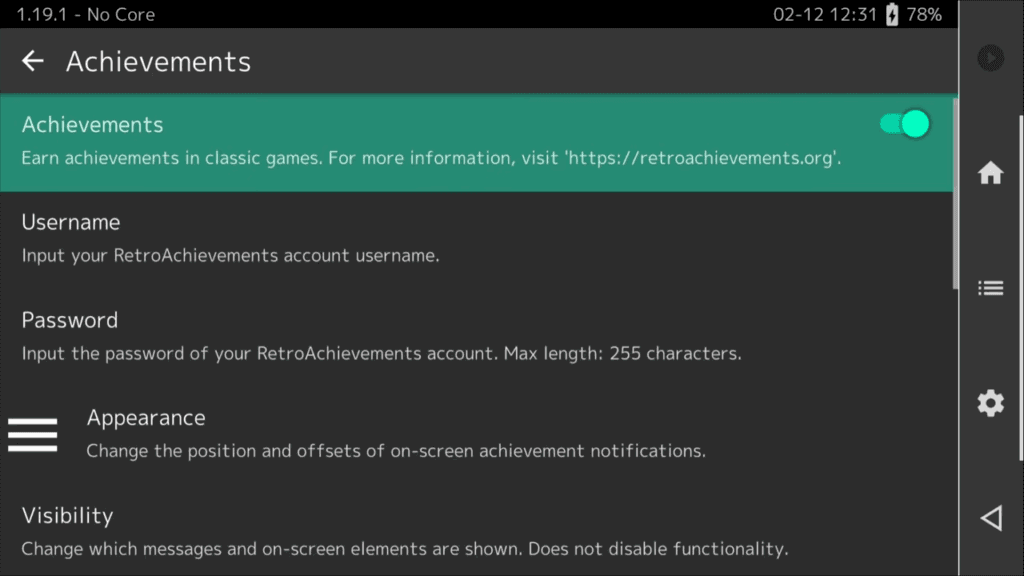
Achievements is where you can login with your RetroAchievements username and password, if you’re interested in earning achievements for retro games.
Check out the RetroAchievements.org website to learn more about that, which I suggest you do, RetroAchievements are awesome.
Directory
But let’s head to directory.
If you are ever confused where RetroArch is putting things, you can come here to see it.

BIOS Files
For example, the first option is System/BIOS and BIOS files are files that you need for CD-based retro systems, like PlayStation 1, Sega Saturn and so on.
Basically, to properly play CD-based retro systems, they need to emulate them and BIOS files are what’s needed.
Unfortunately, this is a legal grey area and I can’t tell you where to get BIOS files, same way that I can’t tell you where to get games, but you can the list of names of the BIOS files you need here, so that you can easily find them on the web.
Once you do, you simply need to move those bios files into the folder that you see here.
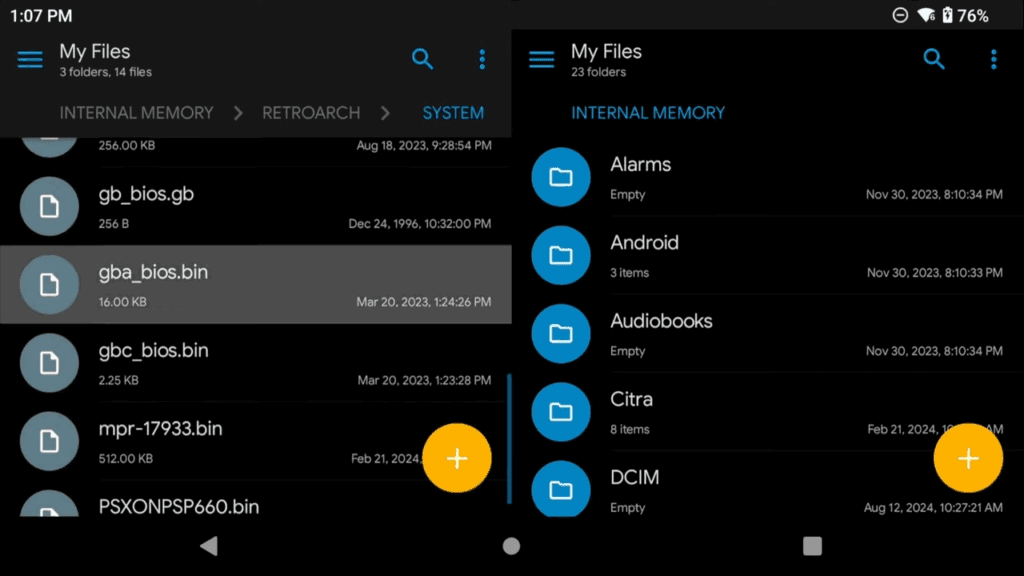
So on Android, that’s the internal storage > RetroArch > system folder.
Just plop your files in there.
Other operating systems will tell you their location, but the default is always the RetroArch/system folder.
Let’s scroll down.
Cheat Files
Cheats are important, especially if you’re a cheater.
Same thing, it tells you right here where to put any cheat files you find and want to use and it’s the RetroArch/cheats folder.

We’ll look at this in a bit.
Saves & State FIles
But all the way down are two very important ones that everyone always asks.
Save Files and Save States.
Number one question with RetroArch is usually where are my save files and save states, and there they are.

By default, in the RetroArch folder, in the saves and states folders.
We’ll come back to this as well.
Always Save
Head back to Main Menu > Configuration File and Save Current Configuration.
You might not believe me, but as far as general RetroArch settings go, we’re kind of done.
That wasn’t so difficult right? We barely did anything.
Booting A Game
Let’s go ahead and boot up a game, and we’ll talk more about saves and states and the in-game menu.
Loading a game the same way I did before, Load Content, navigate to the folder that has my Game Boy games, and this time selecting Pokemon Red.
What are Saves?
Saves are in-game saves.
Think of it as if you were playing the game on the real hardware and you had to make a save.
Whenever you do, it will show up in that saves folder.
So playing Pokemon Red here, push start, Save and there, that will now show in the saves folder, and we’ll go look at it in a second.
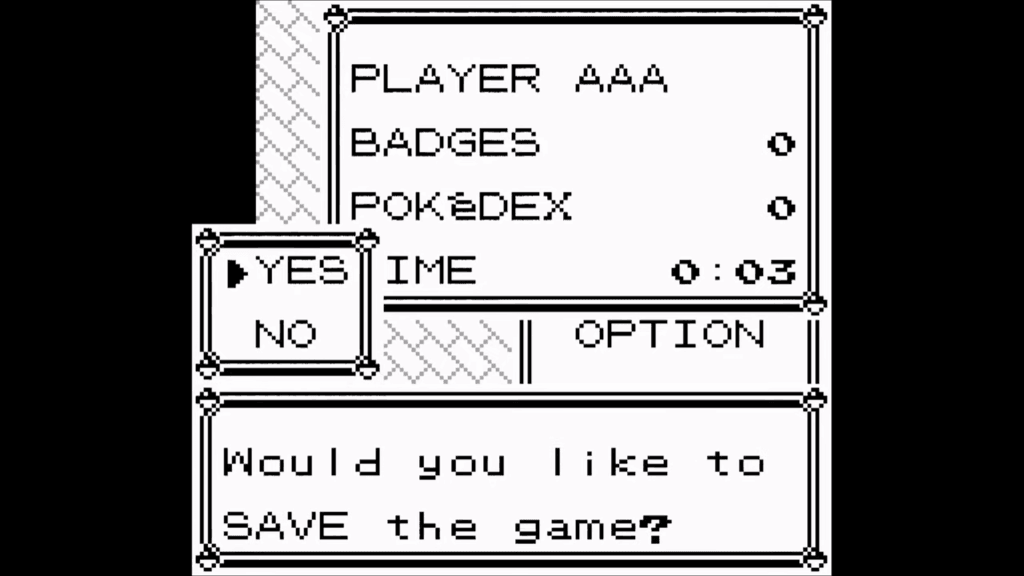
In-game saving should be your first go-to option to avoid losing your saves and progress, always save when you can.
What are States?
States is when RetroArch takes a snapshot of where you are exactly.
If you remember from our hotkeys, we set it to L3+R1.
And you see it shows up at the bottom, saved to slot 0.

This lets you save anywhere in the world, as a save state to come back to.
So if I move a bit, then push L3+L1 to load state, I’m right back where I saved.
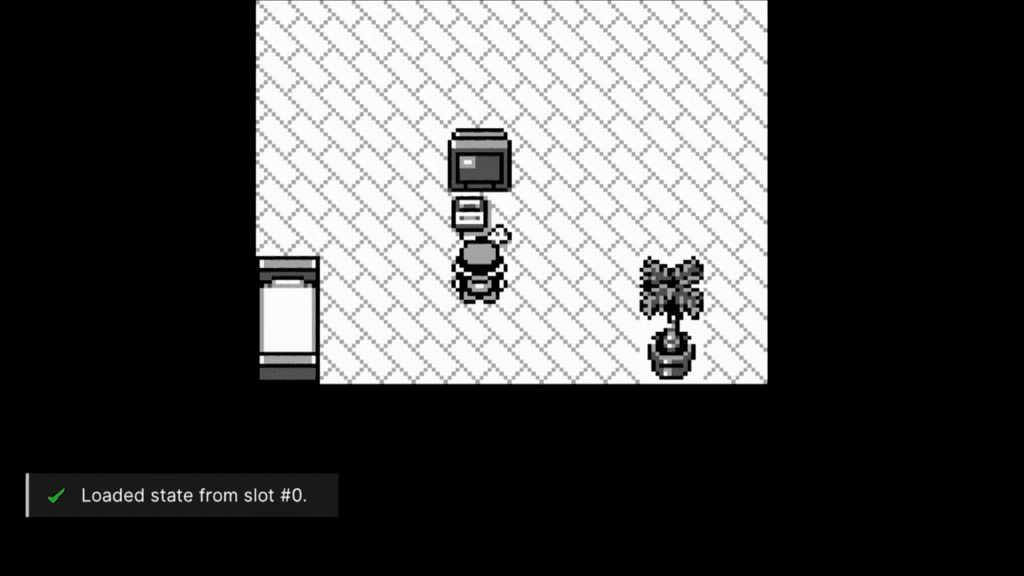
You can also do this in the RetroArch in-game menu, so push L3+X or top button, whatever you set, to open the in-game RetroArch menu.
If you scroll down, you see Save States, and you can make multiple states, or even undo loading a state or undo saving a state.
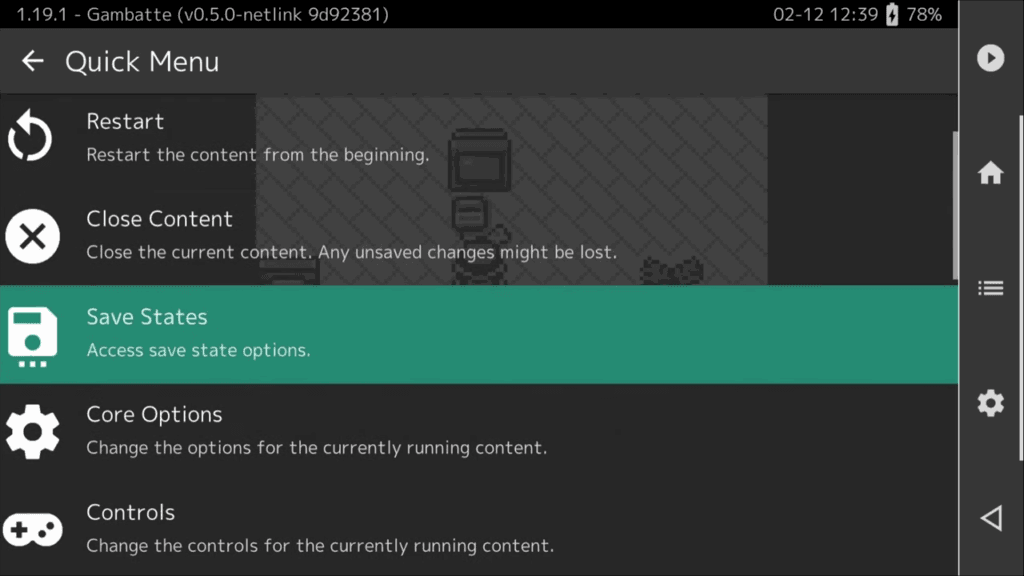
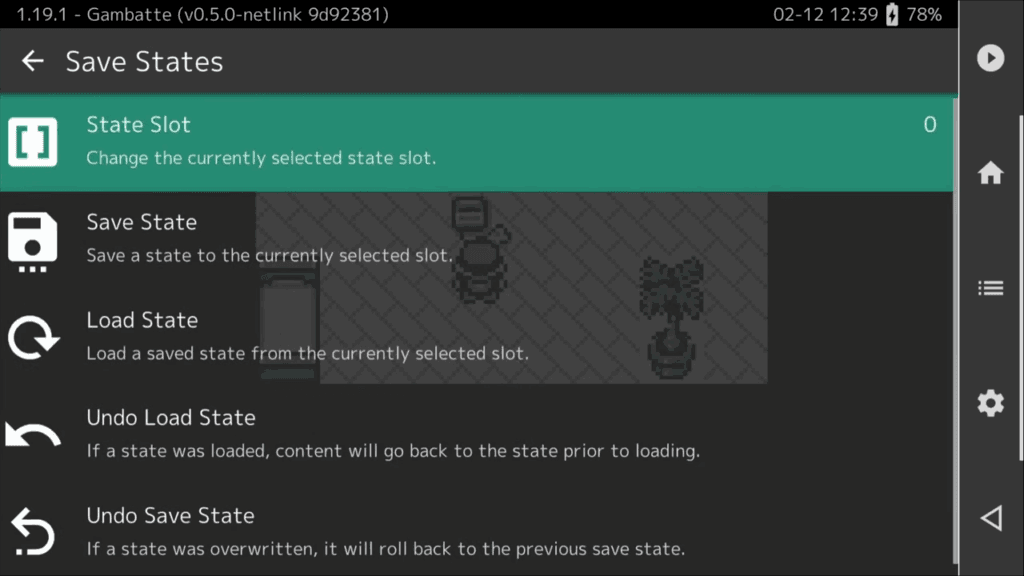
Both of these will get you out of jams where maybe you accidentally pushed the hotkey and didn’t want to, losing hours of progress.
Come here and undo.
Save states are great to use, but can be unreliable as a beginner.
Just be careful.
Personally, I always use a combination of saves and states, and never rely on one without the other, so make it a habit to do both when you’re done playing a game for the day.
Back out to the Quick Menu, and you’ll see a ton of options here.
In-Game Menu
You can Resume playing, Restart the game so basically mimics turning the system on and off, Close Content and more.
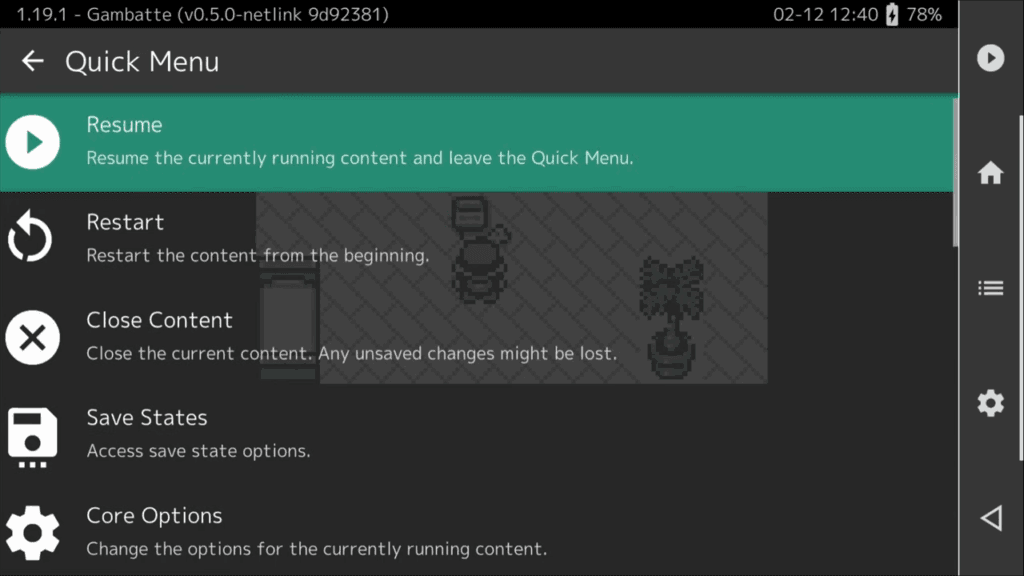
In the interest of being beginner friendly, there’s a lot here, let’s talk about the important parts.
Remap Controls per-game, per-system and more
Controls is important.

We did setup controls already, and RetroArch is smart enough to map those controls for all the systems, but sometimes it might get it wrong or maybe you want something different.
Let’s say you find a game where you don’t like the controls for that specific game, or maybe it’s all of Game Boy games that you don’t like it for.
Head to Controls, then Manage Remap Files and now you have options.
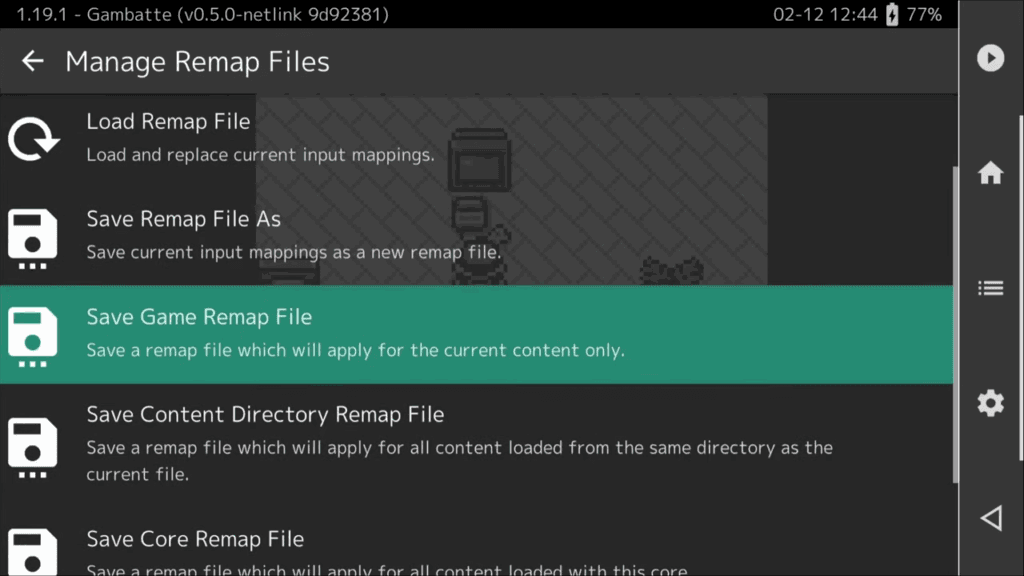
Do you want to change controls for this specific game? Then you’d select Save Game Remap File.
Maybe you want to change the controls for all your Game Boy games, then you’d select Save Core Remap file.
You can always Remove after selecting if you want to revert to default.
But after doing that, head to Port 1 Controls, and make the change you want.
So let’s say I want to swap B and A.
I’ll just quickly do that, and now you’re set and it’ll apply to this game or core, depending on what you chose.
Using Overrides
Overrides is the next important section.
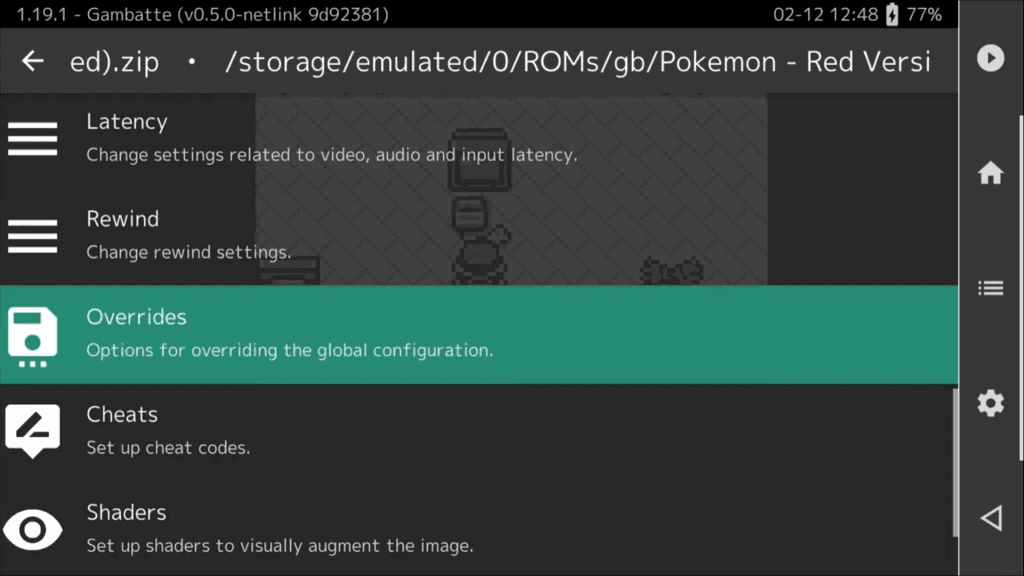
So remember before I kept saying to make sure you save your progress, by heading to Configuration File, Save Current Configuration?
Well, that’s awesome when you open RetroArch by itself and want to change things for everything.
It’s a bit different if you want to change things on a per-game basis, or maybe per-system basis.
Let’s do an example.
Let’s say you don’t want to play Game Boy in its native aspect ratio because you’re a monster and want to stretch everything.
But you also only want to change this for Game Boy only.
So you’re in a Game Boy game, and you head to Settings, Video, Scaling and you set Aspect Ratio to Full.
This looks awful, but you like it because again, you’re a monster.
If I exit the game and come back, it will not save what we just did.
Instead, we head into Quick Menu, and scroll down to Overrides, and here it’s the same as changing controls for a specific game or system.
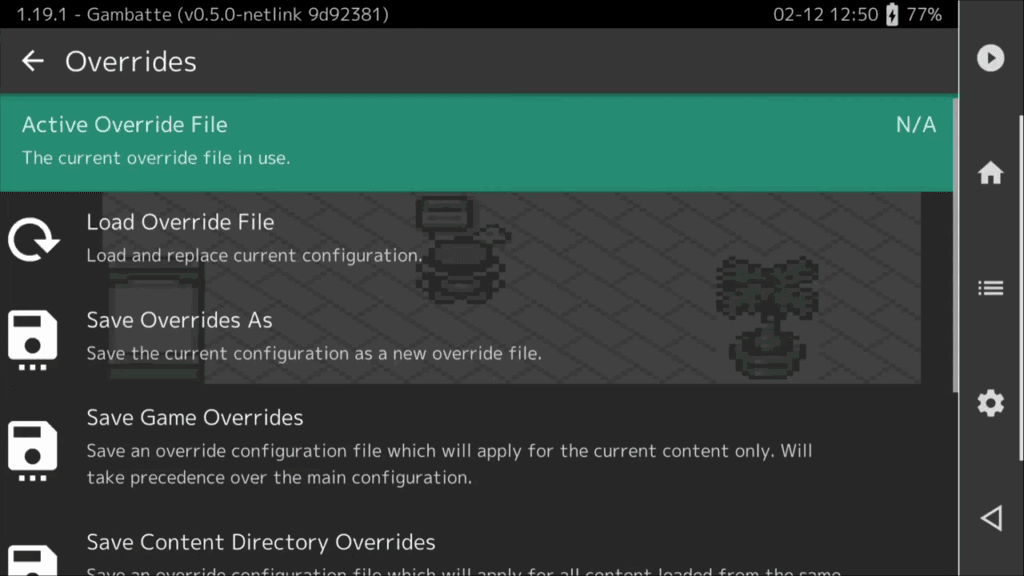
Do you only want these new settings to apply to this game only or to the entire core for all Game Boy games?
Another good example of this is Frame Throttle.
Let’s say I turn fast forward on in Pokemon here and I show the FPS.
We have 10,000 FPS and I can barely control my guy anywhere, it’s way too fast.
You can actually limit the fast forward speed to make it more tolerable.
Head back to the in-game menu, Settings, Frame Throttle, and you can see Fast Forward rate is set to unlimited.
Maybe I want it set to 3x for this game, so I change it to 3x and let’s test it.
That’s a lot more manageable now.
So let’s save that.
Head to Quick Menu, Overrides and now we can save it for this game only or for the entire core.
If I save it for the core, you can always remove the core override after here too.
Easy way to understand Overrides
So to avoid confusion here, whenever you want to change a RetroArch setting for all emulator cores and games, open RetroArch directly, make the change, Save Current Configuration.
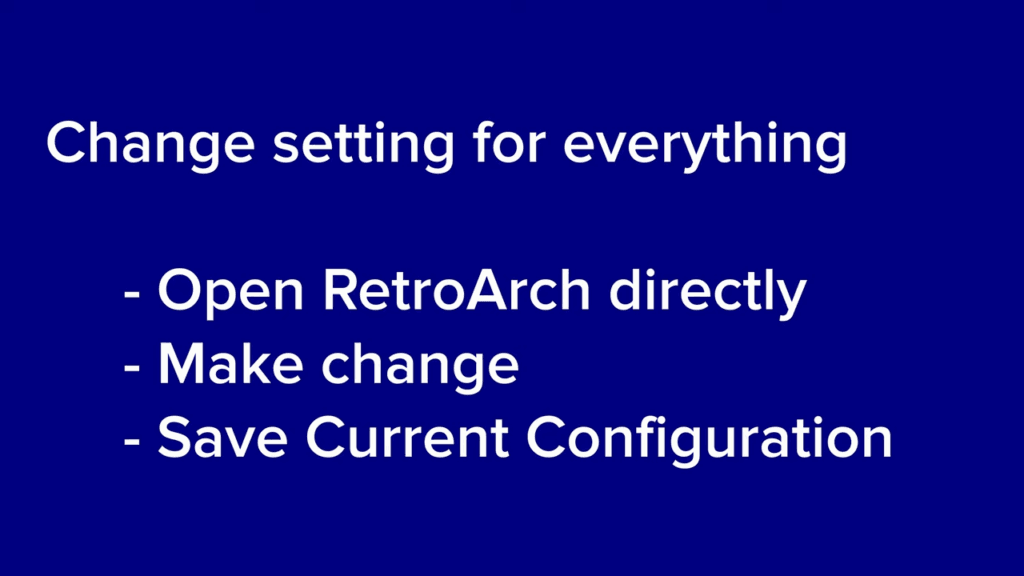
Whenever you want to change a RetroArch setting for a specific game, or specific core, open that game or a game with that core, make the change, Overrides and save a game or core override.
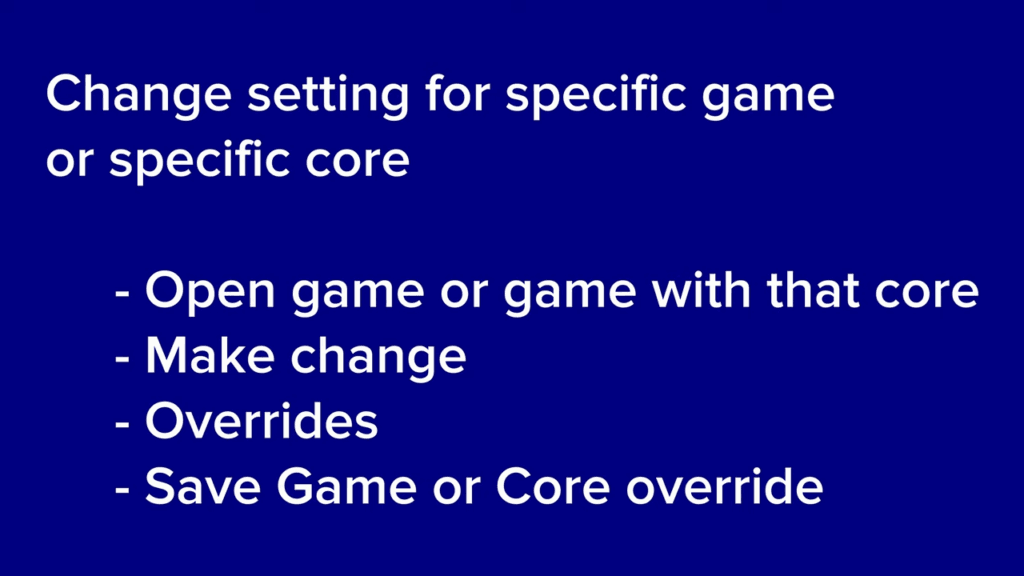
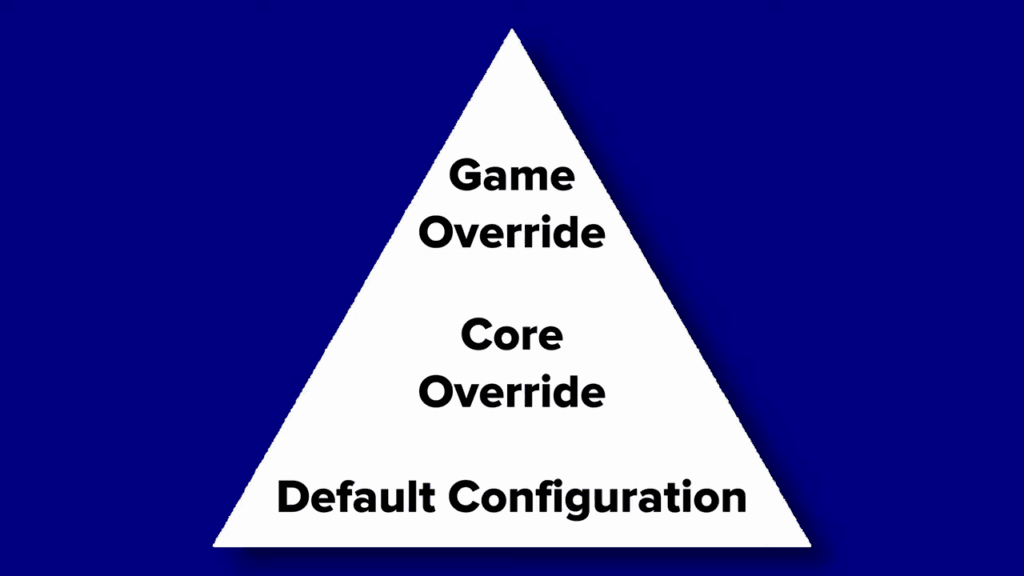
Core overrides will override the default configuration, and game overrides will override both.
If you look at it from a pyramid perspective, game override is top, core override is middle and default configuration is bottom.
Hope that helps.
Cheats
Last menu item and that’s cheats.
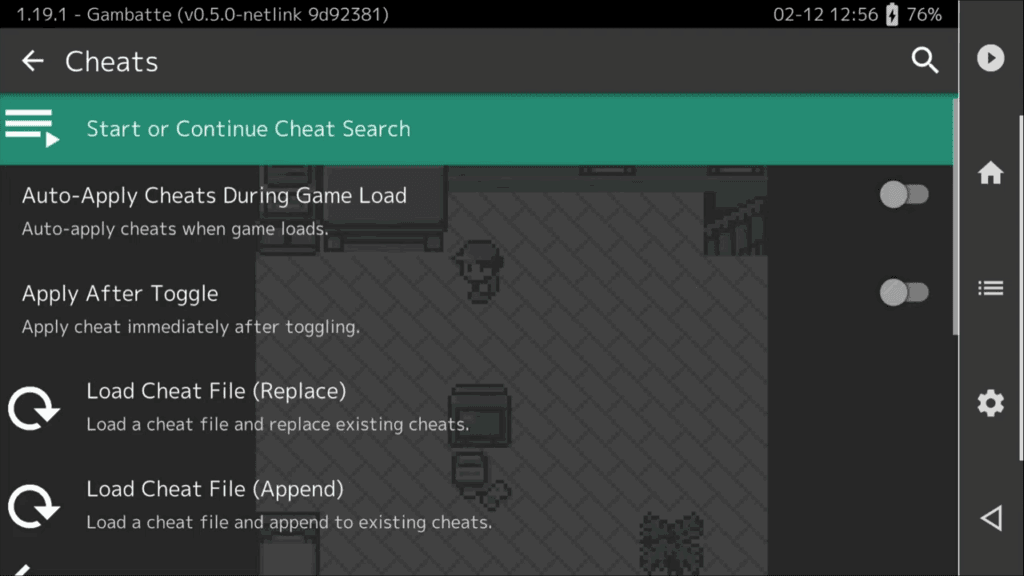
I will warn you here, cheats can break your saves, your states and lose you hours of gameplay – they aren’t perfect, you can break stuff.
Always suggest backing up your saves before attempting them.
Cheats menu is in the quick menu in-game, and if you select it, you see a lot of options.
Now, if you chose to download cheats from RetroArch way at the beginning, or you added Cheats to the folder that we talked about earlier, you can find it by clicking Load Cheat Replace, scroll to the file you manually added or navigate the RetroArch cheats folder for the system you’re in, so Game Boy for me, and then I need to find Pokemon Red Version.

The RetroArch built in cheats may not have your game, which is why I showed you how to manually add cheats you find.
Select the cheat file.
Now if you scroll down, you see all your cheats, so many of them.
So let’s say you want Infinite Money.
Select it, and then choose Enabled.
Back out and click Apply Changes.

We’ve just applied that cheat.
Jump into game, and boom, infinite money right there, buy all the Pokemon.
To stop using that cheat, uncheck enabled and click Apply Changes.
If you scroll up, maybe you use a specific cheat everytime you play and you want to do all of this.
Enable the cheat, apply it and then come here and click Auto-apply cheats during game load.
That way it’s all automatic for you.
Where is everything stored?
Alright, last stop for today is just looking at the folders and where stuff is.
Again, RetroArch is RetroArch on every system.
Remember again that Directory section and where stuff is to find your RetroArch folder.
For Android, it’s the internal storage, RetroArch folder.
Inside of that, every operating system looks the same.

Windows will have these folders, Linux, Android, all of them.
Remember the Cheats folder? It’s right here.
You can put your cheats right into that folder, or you can organize it like how RetroArch does it, but either way, this is where all of that is.
Remember the saves? There’s the saves folder.
And on new versions of RetroArch, it’s separated by the core in folders.

So if I head into Gambatte, there’s my Pokemon save that I made.

If you want to backup your save before attempting cheats, copy this elsewhere.
If you ever want to move a save from another device, it’s as simple as copying the name you see here, renaming your save on the other device if it doesn’t match this already, and then overwriting this save.
The save name has to match the rom name, which it does when RetroArch creates them.
If you’re finding that moving a save isn’t working, try making a new save in-game first, a dummy save, and then overwriting it with the save you want to use.
Usually solves that problem.
Head to states, and it’s the same setup.
Head inside the core folder, you see your state, awesome.
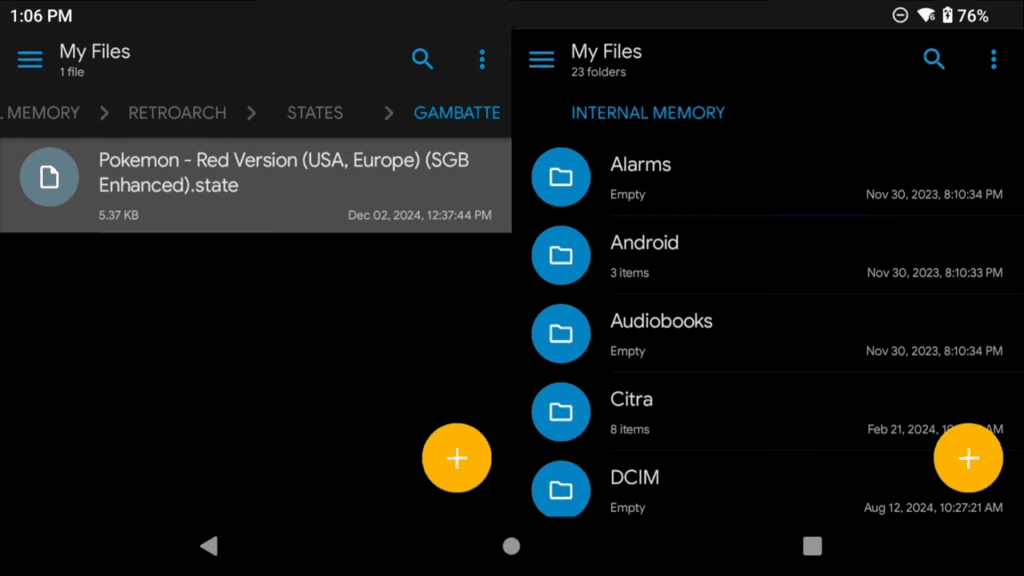
As a beginner, I never suggest that you copy states over.
That’s a recipe for disaster as someone new to RetroArch.
States are very specific and for today, just never move them around.
Lastly, we have the system folder.
Remember again when I talked about BIOS files for your CD-based systems? This is where they all go.
Just right inside of this nice folder here, all your BIOS files, easy and simple.
Very Advanced – Per-Controller Hotkeys
This section will be for anyone that wants to use multiple controllers with RetroArch (not multiplayer) and use per-controller hotkeys.
So for example, you want to use the 8bitdo N64 controller for Nintendo 64, or you want to use the 8bitdo M30 for six button games, Xbox controller for others and so on.
So what’s the issue?
Well, it’s easy enough to map all of these controllers and save the profiles, but what you will not get is consistent hotkeys.
And if you use RetroArch to setup the hotkeys, you will have to re-set them up for each controller, every time you connect one.
That’s annoying.
So here’s what you need to do:
Clear out the RetroArch Hotkeys – Y on the controller will usually remove the hotkey, go through until all of them are gone.
Then:
- Setup your controller as per normal in the RetroPad Binds section. Making sure to select Save Controller Profile.
- Repeat for as many controllers as you have.
Start with one of the controllers that you setup above, doesn’t need to be connected.
Head to your RetroArch folder > autoconfig > android (if Android) otherwise it’ll be dinput/hid/sdl2 or xinput folder (check each, sort by date modified to find your controller, it’ll be in one of these) > open the cfg in Notepad.
You should see a bunch of input lines, which is how you setup the mapping of the device a second ago.
This is what mine looks like for example:
input_driver = "sdl2"
input_device = "(Xbox 360 Controller for Windows)"
input_b_btn = "0"
input_y_btn = "2"
input_select_btn = "4"
input_start_btn = "6"
input_up_btn = "11"
input_down_btn = "12"
input_left_btn = "13"
input_right_btn = "14"
input_a_btn = "1"
input_x_btn = "3"
input_l_btn = "9"
input_r_btn = "10"
input_l2_axis = "+4"
input_r2_axis = "+5"
input_l3_btn = "7"
input_r3_btn = "8"
input_l_x_plus_axis = "+0"
input_l_x_minus_axis = "-0"
input_l_y_plus_axis = "+1"
input_l_y_minus_axis = "-1"
input_r_x_plus_axis = "+2"
input_r_x_minus_axis = "-2"
input_r_y_plus_axis = "+3"
input_r_y_minus_axis = "-3"
We now need to add lines for hotkeys – so that we can save hotkeys in these controller profiles to be loaded (you will not see them in the RetroArch UI, but they will load).
Here’s the hotkeys that I add (copy and paste to the bottom of the cfg file):
input_enable_hotkey_btn = "X"
input_fps_toggle_btn = "X"
input_load_state_btn = "X"
input_exit_emulator_btn = "X"
input_menu_toggle_btn = "X"
input_save_state_btn = "X"
input_toggle_fast_forward_axis = "X"
In order of the list above, the hotkeys are: Hotkey enable button, Show FPS, Load State, Quit, Menu Toggle, Save State, Toggle Fast Forward.
What you need to do now, is replace X with the button you want to do that hotkey.
So for example, for Hotkey enable, I want that to be L3 and if we look at the top list, input_l3_btn is 7.
input_enable_hotkey_btn = "7"So now the line would look like this. Repeat for each hotkey.
Now this is very important. You will notice the end of each line says btn (button), but the last line says axis (axis). You have to make sure that if you are using an axis control, that you rename btn to axis for the hotkey to work or it will not work. This also goes the opposite way too – rename axis to btn if it’s a button that you’re using as a hotkey.
Once you’re done, save the cfg file and repeat these steps for any other controller cfg files you generated.
The next time you load up RetroArch with whatever controller, you should have per-controller hotkeys now.
Do not ever use the Hotkeys section in RetroArch if you plan on doing this as it will ruin your hotkeys.
TATE Mode – FinalBurn NEO
You may want to use TATE Mode for Arcade games, like through the FinalBurn NEO core, let me help.
First, open any FinalBurn NEO game in RetroArch, then open the in-game menu via hotkey.
Head to Core Options > Manage Core Options > Save Game Options.
This makes it so any changes we’re about to make only apply to this specific game – if you want TATE Mode for all your FinalBurn NEO games, you can skip this.
Back out and for Vertical mode, turn it to TATE Alternate. (TATE Alternate will rotate the screen so that the top of the video is on the left side, choose TATE to rotate the screen so that the top of the video is on the right side)
Head back a menu, and this time go into Controls > Manage Remap Files > Save Game Remap File.
This makes it so that any changes we now make to the controller, will only apply to this game.
If you prefer to have this setup for all Arcade games, choose Save Core Remap File.
Back out and head to Port 1 Controls.
See below for the different configurations and how to map them – once you do this, back out to play the game!
For TATE Alternative (face buttons above right stick)
Change Analog to Digital Type to Right Analog.
Set X Button (Top) to Fire 2.
Set A Button (Right) to Fire 1.
Set Right Analog Y- (Up) to Right.
Set Right Analog Y+ (Down) to Left.
Set Right Analog X- (Left) to Up.
Set Right Analog X+ (Right) to Down.
Set Select Button to Coin 1.
Set Start Button to Start 1.
All other mappings should be —.
For TATE (left stick above dpad)
Change Analog to Digital Type to Left Analog.
Set D-Pad Down to Fire 2.
Set D-Pad Left to Fire 1.
Set Left Analog Y- (Up) to Left.
Set Left Analog Y+ (Down) to Right.
Set Left Analog X- (Left) to Down.
Set Left Analog X+ (Right) to Up.
Set Select Button to Coin 1.
Set Start Button to Start 1.
All other mappings should be —.
For TATE (dpad above left stick)
Change Analog to Digital Type to Left Analog.
Set D-Pad Up to Left.
Set D-Pad Down to Right.
Set D-Pad Left to Down.
Set D-Pad Right to Up.
Set Left Analog X- (Left) to Fire 1.
Set Left Analog Y+ (Down) to Fire 2.
Set Select Button to Coin 1.
Set Start Button to Start 1.
All other mappings should be —.
Syncthing
RetroArch can easily be sync’d across all operating systems using Syncthing.



In RetroArch, I am unable to load most Atari Lynx games in beetle, I just get a blank screen. Suggestions? A few .md games work but I can’t get .lnx games to load.
Missing BIOS
im unable to run sega saturn with beetle. all games load into a blank grey screen. can you help?
beetle is not even sega saturn core