What is this?
Anbernic ships their Android devices with their own frontend called the RGLauncher to launch all your emulated games from.

For those following this guide, you prefer using this out of the box instead of the better, more popular options like Daijisho, EmulationStation or Beacon Launcher.
Since RGLauncher is just included by default, it can be easier for a lot of people that just want to pickup and go without hassle.
Setting up your SD card
Let’s start with the basics, if you happened to buy your Anbernic device with an extra SD card, then out of the box, your frontend will be mapped to it and setup already.
For those of you in this scenario, feel free to skip to the next section unless you’re curious about how to setup a new SD card for the future.
You don’t need an SD card, you can store games right on the device if you’d like, but most people do buy an SD card so I’ll show you that route.
Feel free to follow along and just use the internal storage if you’d like instead.
Using Windows
The first thing we need to do is setup our SD card and there’s two ways you can do this.
If you don’t have the device yet, and want to setup your SD card ahead of time, you can connect it to your PC using an SD card reader, find it in your File Explorer, right click the card, Format, choose EXFAT, default allocation size, give the SD card a name if you’d like and just push Start.

This is because you need an EXFAT formatted SD card for your device to recognize it.
Using the device
Alternatively, if you don’t have a PC, wait for the device to arrive, pop the SD card in, you might see a notification for it, you can tap it, and then choose Portable storage and format.
Or, head to Android’s settings, Storage, choose the SD card from the drop down, three dots top right, Format and Format SD card.

If you get a drop down asking you to setup the SD card, always choose portable storage.
Creating the ROMs & system folders
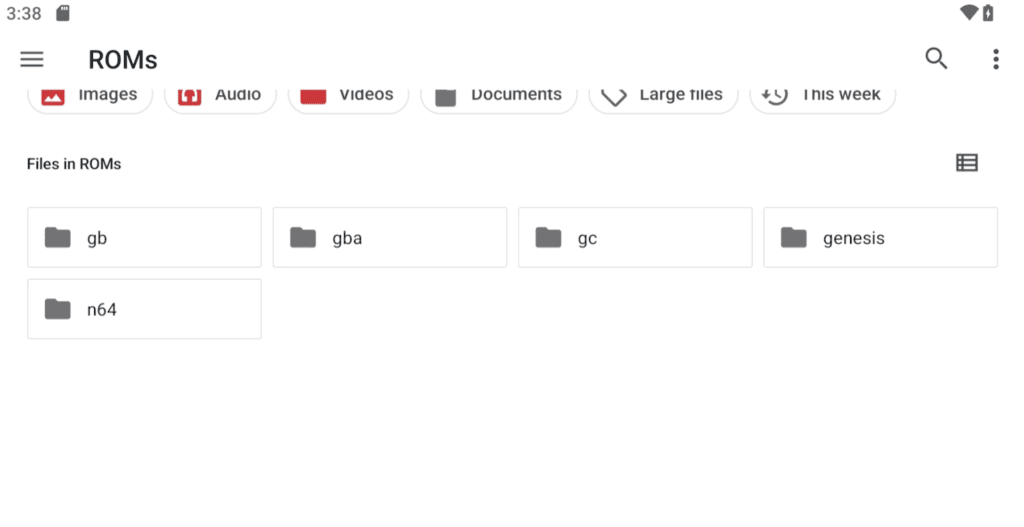
In both scenarios, after formatting, you can go ahead and create a ROMs folder just at the top level of the SD card, you can do this on the device using the Files app or on the PC.
Inside of that ROMs folder, you’ll want to create system folders.
They can be any name you want, gb for Game Boy, gba for Game Boy Advance, genesis for Genesis and so on, but feel free to just create system folders for any systems you plan to play or get games for.
You will need games to follow this guide, of course, and the below video should help you.
Starting RGLauncher
Alright, so at this point, you have your SD card that came with the device, or a new branded one with a ROMs folder setup and systems inside. We’re ready to continue.
Go ahead and jump into the frontend and there’s two ways to do so.
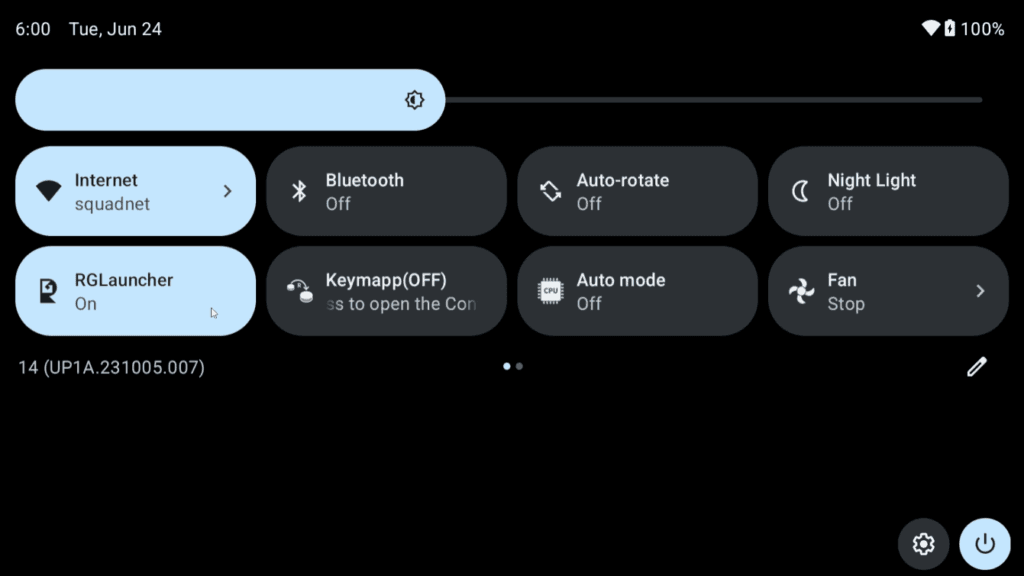
You can swipe down from the top and tap RGLauncher or you can hold the R button on your device.
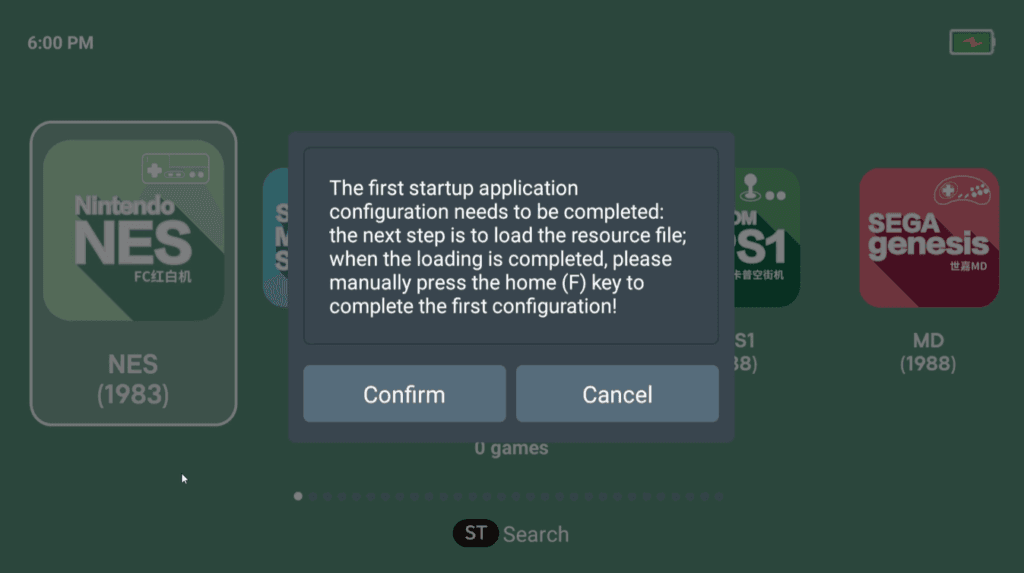
Click the confirm button for it to start the setup and it’ll load into RetroArch, allow the popups.
When they all disappear, scroll down and Quit RetroArch.
You’ll now be in the RGLauncher frontend and if you’re here using the SD card that came with the device, then you’ll likely see all your games and everything already.
For the rest of us, we have to tell the frontend where our games are. We’ll do that in a bit.
Show/hide systems
First, go ahead and push Select on the home screen of RGLauncher, then head to Settings, and then Emulator Selection.
In this screen, you can pick and choose which systems to show in the frontend to clean it up a bit.

So for me, I’m just going to hide all the systems that I don’t have games for, just make it look nicer on the home screen.
Changing Themes
If you head back to Settings, then Theme style, you can try the different themes available to make it look even nicer if you want.
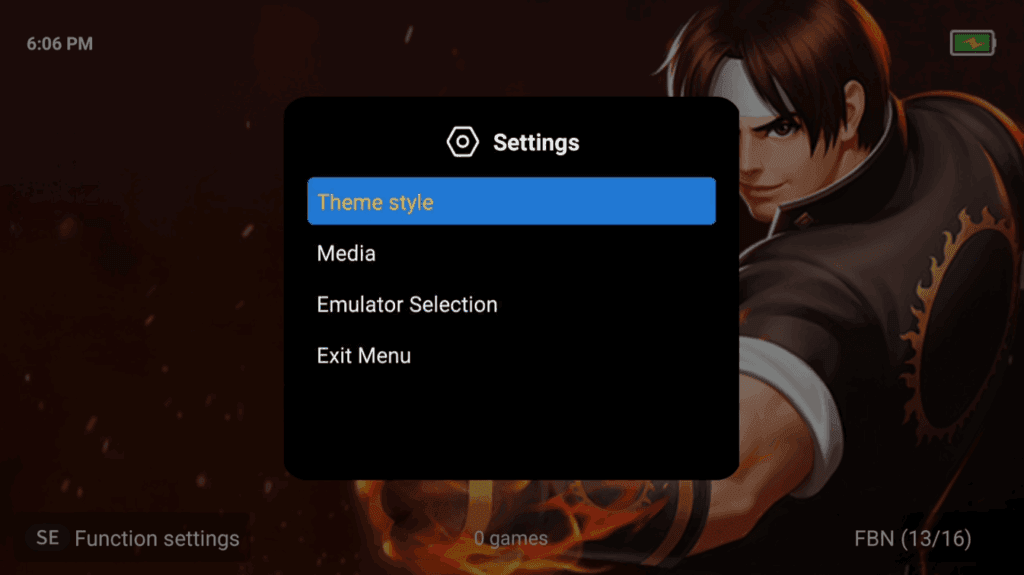
I’ll leave it on default, but its your preference which one you’d like to use.
Adding emulators/games to systems
Now we’re ready to tell the frontend where our games are.
So jump into a system, I’ll start with NES.
Push Select and you’ll get a new menu.

The first is asking okay, for our NES games, which emulator do we want to use?
And you can leave this as default unless you know for sure you want to change it.
But head to the top and over to ROM Setting.
This is where we have to tell the frontend where our NES games are.

I’m going to delete the path that’s there already since I’m using a new SD card and that path didn’t exist anyway.
Now click the Plus icon, android is my SD card name, then I’m going to go to the ROMs folder we created and select the nes folder.
Then click Start searching for games.
If we head back, you can see our ROMs are now there, ready to be launched.
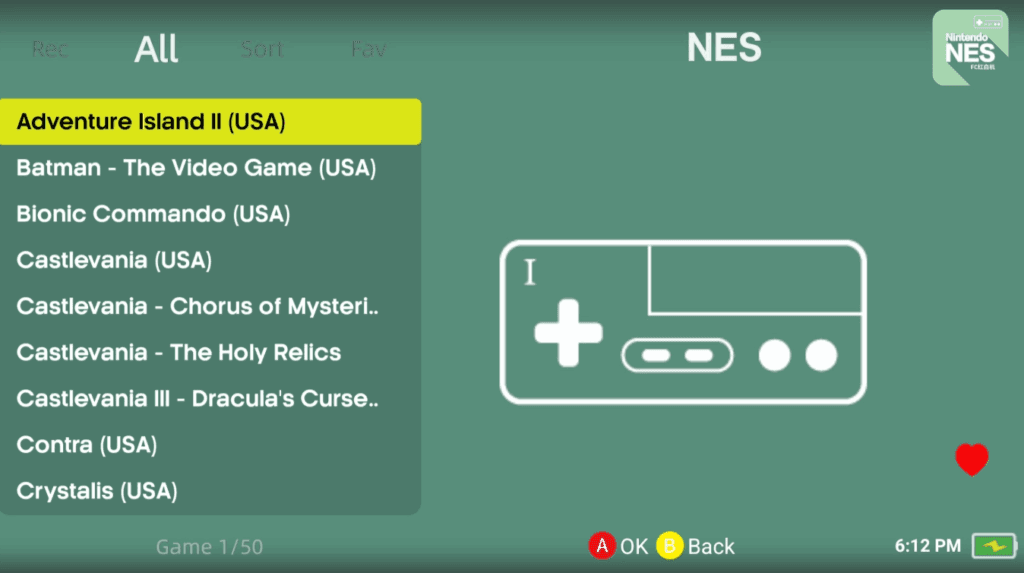
Alright we did NES, let’s do one more with SNES, but you’ll have to repeat these steps for each system.
It’s the same steps, open SNES, push Select, head to ROM Setting, add the path to your SNES games folder and click start search and there they all are.
Repeat again for each system until you load up all your games.
Hotkeys
Now if you push X, it’ll favorite a game.
A will launch a game.
You can use the back button on the handheld to open RetroArch’s menu then Quit to exit.
Use L2 and R2 to move along the tabs at the top for Recent, All, Sort and Favorites.
Lastly, Start will open a Search menu.
Now, quick tip, if you push select on the home screen, you can see Rec and Fav, for Recents and Favorites.
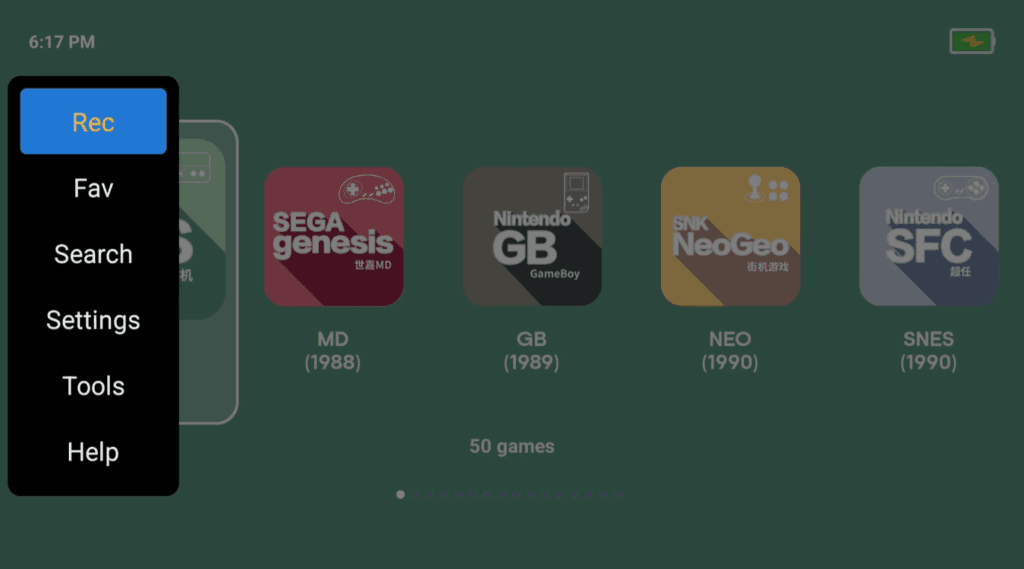
It’s a quick way to load up your recent or favorited games.
Updating gamelists when deleting/adding games
Now let’s say you add or remove some games, and you want them to be scanned and added into your system lists.
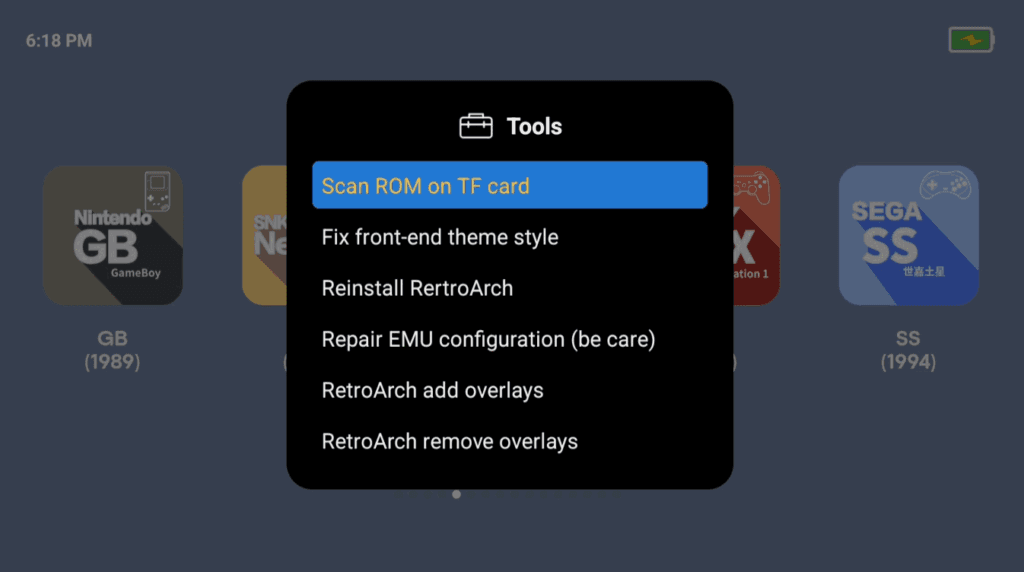
Push Select, head to Tools then Scan rom on TF card to update your lists.
Box Art
Last topic of discussion and that’s box art.
You may have noticed, there’s no option for scraping box art – just another limitation of Anbernic’s front end.
Important note: For Box Art to work, the system folders must be on the ROOT of your SD card. So, for example, your gb folder for Game Boy must be on the root of your SD card, not inside of a ROMs folder.
If you have a PC, I’ll leave the instructions here for how to add box art, but be warned that it is lengthy and likely not worth doing.
Connect your ROM SD card to your PC and head to Screenscraper.fr and make an account.
Click Skraper at the top right and then Download at the top. Download for your OS.
Extract the 7z file using 7-Zip. Open SkraperUI.exe and login with your Screenscraper credentials that you just created. Click Validate then next.
Let it download resources, it’ll take a very long time.
Click Recalbox and next.
Now it wants to know where your Roms are, so click the folder and navigate to your SD card. You should see it shows all of the systems here, click next.
Next again.
If you look on the left, that is all of the system folders it found, regardless of whether there’s Roms inside or not. It’s possible it missed a few, so if that’s the case, click the Plus icon, find the system it missed, click the system icon then click okay. Now you have to point it to where that system is so change the Games/Roms folder to the right folder for that system on the SD card. Do this for any missing systems.
Head to the left, click All Systems, go to Game list and change to NO BACKUP, CREATE NEW OR OVERWRITE EXISTING. Head to Media, and you can choose what you want scraped. Remove box3d using the minus button on the left. For media type, internal mix, you can choose what you want. I’m just going to leave it on 4 images.
Now for output folder, remove media and images and change it to images. It should read: %ROMROOTFOLDER%\images\
Once set, click the play button bottom right. Then click OK and it’s going to run. This is going to take a very long time, a very very long time. I would suggest doing one system at a time, by clicking the system on the left then clicking play, but it doesn’t really matter, you can just click the X to stop it and then play again later and it’ll skip already scraped games. In either event, once it’s done scraping, and you put your SD card back in, you’ll have images for your Roms that you can see on the device.


Your guide for the box art doesn’t work. Have followed the guide and tried multiple times to scrape the art but it doesn’t show up in the stock rg launcher.
Not sure what the problem is, I don’t have any Android Anbernic devices on hand to troubleshoot, but this was working as of a month ago.
Cons – I can’t add c64 and amiga emulator
on ES-DE it’s there
How to add new system (for example, C64) to RG Launcher?
Will there be subfolders under the art folder in for instance my NES Rome folder?
Or do the images go directly in the folder?
Thanks for this guide. Where on your SD card do you put the scraped boxart and how do you tell the launcher where to find it?
Hey, the box art section is what you’d need to follow.
Thanks. Ihad missedthat detail.
If you used the SD card as provided by Anbernic, you can study how their formatting works.
When you set the path for your roms, the launcher will also search for an xml file called “gameslist.xml” and will populate the game list + box art based on this file.
The way Anbernic arranged it is that they created a folder called “image” in each rom folder, and the gameslist.xml will refer to this folder for each individual images (so…something like ./images/Mario.jpg ) as well as other settings.
So, the content of the gameslist.xml will be something like:
./SMB.iso
Super Mario Brothers Super Show
./images/Mario.jpg
So, done correctly, you will see in the Launcher “Super Mario Brothers Super Show” with your image as the boxart and it will launch the rom as defined. Else, all you will see is SMB.iso
There are, unfortunately, some limitations that Im still discovering for myself(they sometimes cannot detect the rom, so the settings will not work, and the links cannot be outside of the folder you defined the roms. (so, you cannot have 2 folders: /nes and /images and point to the later for your images. It must be within the /nes/images ) )
Something went wrong with the formatting, its supposed to look this this(modified to bypass the text editor)
./SMB.iso
Super Mario Brothers Super Show
./images/Mario.jpg
Why cant I edit?
(replace the () with )
(game)
(source)./SMB.iso (/source)
(name)Super Mario Brothers Super Show(/name)
(image)./images/Mario.jpg (/image)
(/game)