Best devices for 3DS Emulation
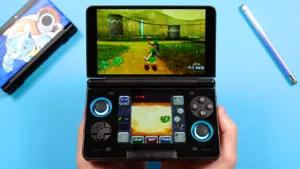
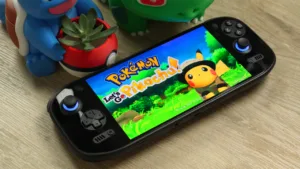
If you’re curious what the best devices are for 3DS emulation, here’s a few of my top picks:
- Android: Retroid Pocket 5 – (Review) – (3DS Showcase)
- Android: Retroid Pocket Mini V2 – (Review)
- Android: Retroid Pocket Flip 2 – (Review)
- Android: AYN Odin 2 Portal – (Review)
Backup Lime3DS/Citra (optional)
For those of you that have Lime3DS installed, or an older version of Citra, let’s first talk about the folders you should backup so you can keep your saves, or maybe your existing HD texture packs and cheats.
So, whenever you installed Lime3DS or Citra, you would have had to create a folder either on your internal storage or your SD card for the emulators to save data in – you personally had to name those folders, so this will be different for everyone, but head into your internal storage and look for a Citra folder, or Lime3DS folder – or maybe you remember what you named it.
You can also open Lime3DS or Citra, head to Options and scroll down and it may show you the folder location under Select User Folder, this may not apply for all versions.
Once you find it, go ahead and backup these folders somewhere else, I’ll just move them to my Downloads folder.
Cheats folder which has your cheats and 60FPS cheats, load folder which has your HD textures and mods, and lastly your sdmc folder which has all your saves and any updates and DLC you’ve installed for games.
Setup
Head to the Google Play Store and install Azahar, or you can head to the Azahar Releases page and download the latest .APK onto your Android device: https://github.com/azahar-emu/azahar/releases
Install the APK and then open Azahar.
Click Get Started.
Grant permission for Notifications. Allow on the popup from Android. Click Next.
Grant permission for Microphone. Can click “while using the app” on the popup from Android. Click Next.
Grant permission for Camera. Can click “while using the app” on the popup from Android. Click Next.
Now we need to select our User Folder, and that’s where Azahar will save all of your data.
Click Select, and it should take you to your Internal Storage. Select Create New Folder at the top, and name it Azahar. Then select Use This Folder at the bottom. Then OK. Click Next.
Now we need to tell Azahar where our 3DS games are located. If you don’t have any ROMs, use the video below as reference.
Important to note that 3DS ROMs need to be in that .cci file format. Most of the ROMs that you find online are in .3ds file format, so a simple rename from .3ds to .cci is all you need to do.
Click Add Games and navigate to the folder that has your 3DS games in it. Click Next. Then click Continue.
Settings
Now you’re at the home screen of Azahar and you should see all of your games populating, but before we open and run anything, let’s make some setting changes.
Click the three dots on the top left for Options. Then click Settings.
Configure Controls
Head to Gamepad and then map the controls of your device to the inputs on-screen for a 3DS. Back out a screen when done.
Configure Graphics
Now head into Graphics, and this will be something you’ll need to test on your end, but in a lot of cases, you’ll want to change Graphics API to Vulkan.
Then, in either scenario, OpenGLES or Vulkan, you’ll want to test turning on Enable asynchronous shader compilation.
For Internal Resolution, this will be dependent on the power of your device. You can try upscaling if you have a decently powered device. Back out to Options when done.
Scroll all the way down and enable Custom Textures and Async Custom Texture Loading, both of these will apply for HD textures.
Configure Dual Screen
Head to Settings > Layout > Landscape Screen Layout and set it to Single Screen.
Then, select Secondary Display Screen Layout and set it to Bottom Screen.
Installing updates/DLC
If you head to Options > Install CIA file, you can install updates and DLC files. These come in the .CIA format. If you have them, this is where you’d install them. Back out to the Home Screen.
Removing on-screen touch controls
From the Home Screen, if you select a game, you’ll boot into it. Let’s jump into one now.
The first thing you’ll notice is there’s on-screen touch controls, and if you’re using a Handheld device, we don’t need that.
Access the in-game Azahar menu by pushing the Back button on your Handheld device (if it has one), or swipe up and click the Back arrow and you should see the panel pull out from the left side.
Head to Overlay Options, and uncheck Show Overlay.
Show FPS
From the in-game menu, head to Overlay Options, and check Show FPS.
Change screen layout
From the in-game menu, head to Landscape Screen Layout and change to any of the other options available. You can also choose Swap Screens from this menu.
Custom Drivers
Azahar has support for custom drivers which help Snapdragon processor devices.
These can help, with fixing graphical issues (like Froakie in Pokemon X/Y and so on).
You can find the section in Settings > GPU Driver Manager, and you can use the Install button bottom right to install the driver.
You can find custom drivers for your Snapdragon device here: https://github.com/MrPurple666/purple-turnip/releases.
Cheats
For Cheats in Azahar, you can access the Cheats menu using the in-game menu, then Cheats or from the Home Screen of Azahar by pushing and holding on a game with your finger.
To find Cheats, head to this Github: https://github.com/JourneyOver/CTRPF-AR-CHEAT-CODES.
At the top, head into the Cheats folder, and you should now see a whole list of games.
Find the Game that you want to add Cheats for, and you have to make sure the Region and Version matches the game you have.
Head into the Game folder, and you should see a .TXT file with a long string of numbers. Click into that and you’ll now see a whole bunch of cheats.
Click the Download button on the top right labelled “Download raw file” and you should download that .TXT file.
Move that file into your Azahar folder, Cheats folder. If you followed this guide, it will be on your Internal Storage, Azahar, Cheats.
Open Azahar, and find the Game you added Cheats for, then push and hold on the game with your finger.
If you grabbed the right .TXT file that matches your game’s region and version, you should see your cheats in a list, and you can enable or disable them.
Alternatively, if you’re in-game, you can open the Azahar in-game menu, select Cheats, and enable or disable them on the fly.
60FPS
For 60FPS Cheats in Azahar, you enable them the same way you enable Cheats above.
To find 60FPS Cheats, head to this GBATemp post: https://gbatemp.net/threads/60-fps-patches-cheat-codes-releases-and-discussion.550527/.
Find the Game you want to add 60FPS Cheats for, and if you click it, you’ll see codes depending on the version of the game.
Then, in Azahar, you want to push and hold on a game from the Home Screen with your finger, and you should see the Cheats menu and a Plus icon bottom right to add Cheats.
Give the code a name, so 60FPS, and then in the Code box, you want to copy/paste or enter the 60FPS cheat code that matches your game version.
Once you do, you should see your 60FPS cheat in the list, and you can now enable or disable it.
Alternatively, if you’re in-game, you can open the Azahar in-game menu, select Cheats, and enable or disable it on the fly.
HD Texture Packs
HD Texture Packs do not work on Azahar Plus for some reason, you need to use proper Azahar like this guide shows you.
To install HD Texture Packs in Azahar, there’s a few steps.
The first, as of right now, there isn’t a good consolidated list of HD Texture Packs in one place, so you’ll need to find them separately on a per-game basis.
Once you do, open Azahar, head to Options, Graphics and scroll all the way down and enable Custom Textures. It’s also handy because it tells us exactly where to put those HD Texture Packs right here.
Then, just boot up any game so it can populate those folders for us. Boot up a game, exit the game.
Now, you can put your HD Texture Packs inside of the Azahar, load, textures folder (with whichever folder you put in here being the TitleID of the game).
Example – Ocarina of Time 3D HD Texture Pack
Let’s use an example, and I’m going to use Henriko Magnifico‘s awesome Ocarina of Time 3D 4K texture pack seen here: https://www.henrikomagnifico.com/texture-packs (you have to scroll through the Patreon to get to the free posts and there will be a Download link in the post).
The file you get after downloading is either Zelda OoT 3D 4K 1.9.0c (4K).zip or Zelda OoT 3D 4K 1.9.0c (1080p).zip, depending on the resolution you want. Extract whichever zip file you downloaded. If you downloaded this on to your device, you can use Solid Explorer File Manager as a file manager and to extract.
Now head inside to the user folder, then load, textures, and if you’re using the NTSC version of the game, it would be the one that ends in 500 > 0004000000033500.
You want to copy that folder onto your device, and put it into your Internal Storage, Azahar, load, textures folder.
Boot up your game and enjoy the awesome HD Textures!
Mods
Let’s use a popular example – Pokemon Photonic Sun or Prismatic Moon, which are romhacks of Pokemon Ultra Sun and Ultra Moon, but the process for installing mods will work for anything that you need to install mods for.
In this scenario, you need to have a Pokemon Ultra Sun or Moon game, and you need to have the 1.2 update installed, according to their installation instructions. Both of these are things you can do by following the earlier parts of today’s guide.
You’ll know that you have the right version as the icon will say ver 1.2 in Azahar.
Then, we’re going to go to their Download link in their pokecommunity post, choose Moon or Sun for whichever game you have, and then download the Standard or Rebalanced zip – depending on which version of the romhack you want. I’m going to grab Rebalanced.
Extract that zip.
Head inside of that extracted zip folder, then inside the luma folder > titles, and then you’ll see the title ID folder.
Now, on your device, head to the Azahar folder, then load, and you want to create a folder here called mods if it doesn’t exist already.
Inside of that mods folder, copy and paste the title ID folder from the zip we extracted.
Close Azahar if it was open, then reopen it and choose your Ultra Sun or Moon, whichever you decided and you should be off and playing Photonic Sun or Prismatic Moon.
For this mod, you’ll know it worked because the text will say welcome to Prismatic Moon right in the beginning.
But again, the process for mods is all the same – inside the mods folder, put the title ID folder of the mod and launch your game.
Compress your ROMs
To compress your ROMs from CCI to ZCCI on Android, in Azahar, push and hold on a game in the list > Compress and then Save the compressed ROM in your 3DS ROMs folder.
That’s it! You can then delete the old non-compressed ROM after.
Syncthing
Azahar can easily be sync’d across all operating systems using Syncthing, including with Citra, Lime3DS and other Azahar installs.
For the guide on how to do so, click here.
Frequently Asked Questions
- How do I fix Fire Emblem Awakening’s black lines for text?
Use OpenGL. Custom drivers have also helped if you’re using a Snapdragon device. - Why is my game stuttering?
It’s not stutter, it’s shaders compiling. Play more and longer and they will compile over time.


Do you think y9u could help me with Yo Kai Watch 3 Save File?